Loading...
Loading...
Loading...
Loading...
Loading...
Loading...
Loading...
Loading...
Loading...
Loading...
Loading...
Loading...
Loading...
One of the first things you should do as the admin of your new deployment, is customize certain settings based on the project you’re working on. This section describes how to change your general and map settings, as well as how to configure data sources, manage surveys and categories.
This section allows you to set up the platform to receive emails from users. Before getting started, make sure that you have an email account set up on Gmail, Yahoo or any other service provider. Make sure that you have IMAP/POP enabled (For more information on these two protocols, visit this website. Instructions on how to enable the IMAP/POP settings in your email can be found here
Gmail settings: Follow this guide to enable IMAP from external clients with Gmail. Keep in mind: There are a few settings you need to configure so that Ushahidi can pull from a Gmail account.
Step 1: Check that IMAP is turned on
On your computer, open Gmail.
In the top right, click Settings See all settings.
Click the Forwarding and POP/IMAP tab.
In the "IMAP access" section, select Enable IMAP.
Click Save Changes.
Step 2: Check that Two-Factor Authentication is turned on One needs to have Gmail's Two-Factor Authentication enabled. Visithttps://www.google.com/landing/2step/ if you do not have it enabled for your account.
Step 3: Create an App password This is a 16-digit passcode that gives a non-Google app or device permission to access your Google Account. (Google Docs here:https://support.google.com/mail/answer/185833?hl=en-GB)
On your computer, open App passwords
When prompted for "Select the app and device you want to generate the app password for":
Select “Mail” under the drop-down for “Select app”
Select “Other” under the drop-down for “Select device”
When prompted for text input, enter your Ushahidi deployment name
(e.g. The name of my deployment is Free Media, I’ll enter “Ushahidi Free Media ”).
Copy the password to your clipboard that is automatically generated and save it somewhere (we would need this later).
Yahoo settings: Yahoo
Email setup on Ushahidi platform
To get started with email the setup, click on the add source button on the top right as shown and select Email.
Input the following email account settings
Incoming server type: You have two options to select from, POP and IMAP. We recommend using IMAP if possible because it’s the best way to make sure you can see all your mail at any time on all of your devices
Incoming server: Enter the address of the server where your email services are hosted. E.g mail.yourwebsite.com and for Gmail: imap.gmail.com
Incoming server port: Enter the port that your email account uses for incoming emails. This is also provided by your service provider and depends on the use of SSL(Secure Sockets Layer)/Transport Layer Security(TLS) or not. As a standard rule;
Enter 993 (Since we’re using IMAP) for Gmail.
POP uses port 110 , but SSL/TLS encrypted POP uses port 995
Incoming server security: You have 3 options to choose from to enhance secure connection to your email mailbox, depending on which is supported by your email service provider.
None
SSL - Read more on Secure Sockets Layer for Gmail
Incoming user name: Enter the email address you want to use to receive emails e.g sample@youremail.com. We recommend setting up a separate email address for this purpose, preferably one that has a lot of available space to avoid the account getting full in a short time, especially if the platform will be receiving a lot of submissions via email.
Incoming password: Enter the password of the email account inserted above. Enter the “App password” generated above for the gmail account.
Next:
Click on Save and this data source’s settings will be saved. Unstructured posts from email will now be pulled into the platform.
If you’d like to edit your email configuration, simply click on the the email data source to see the edit form, and make your changes.
If you no longer want the email data source simply click on the data source as if you want to edit it and the use the delete button.
Note: Reports coming via email will take a while before they reflect on the platform because there is a “job” that needs to be run in the database and those jobs run every 10 minutes or so.
We are having some issues with the play store at the moment, you can download the SMS Sync app at https://github.com/ushahidi/SMSSync/releases/download/v3.1.1/smssync-withAnalyticsRelease-v3.1.1-RELEASE.apk
SMSsync is a simple, yet powerful SMS to HTTP sync utility that turns any Android phone into a local SMS gateway by sending incoming messages (SMS) to a configured URL (web service).
Please note that SMSsync works on any SMS-enabled device running Android 2.1 and above.
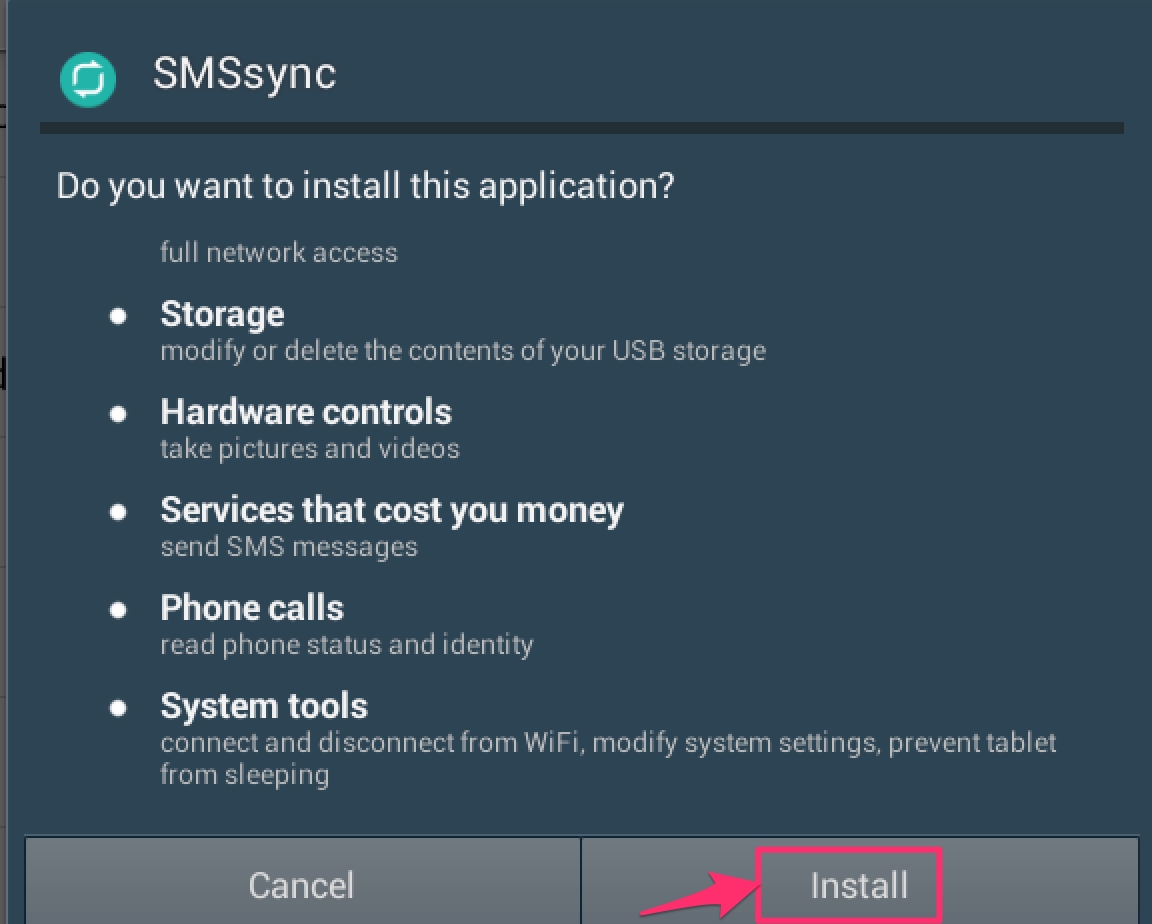
Once you have downloaded it, click on install to save it on your phone.
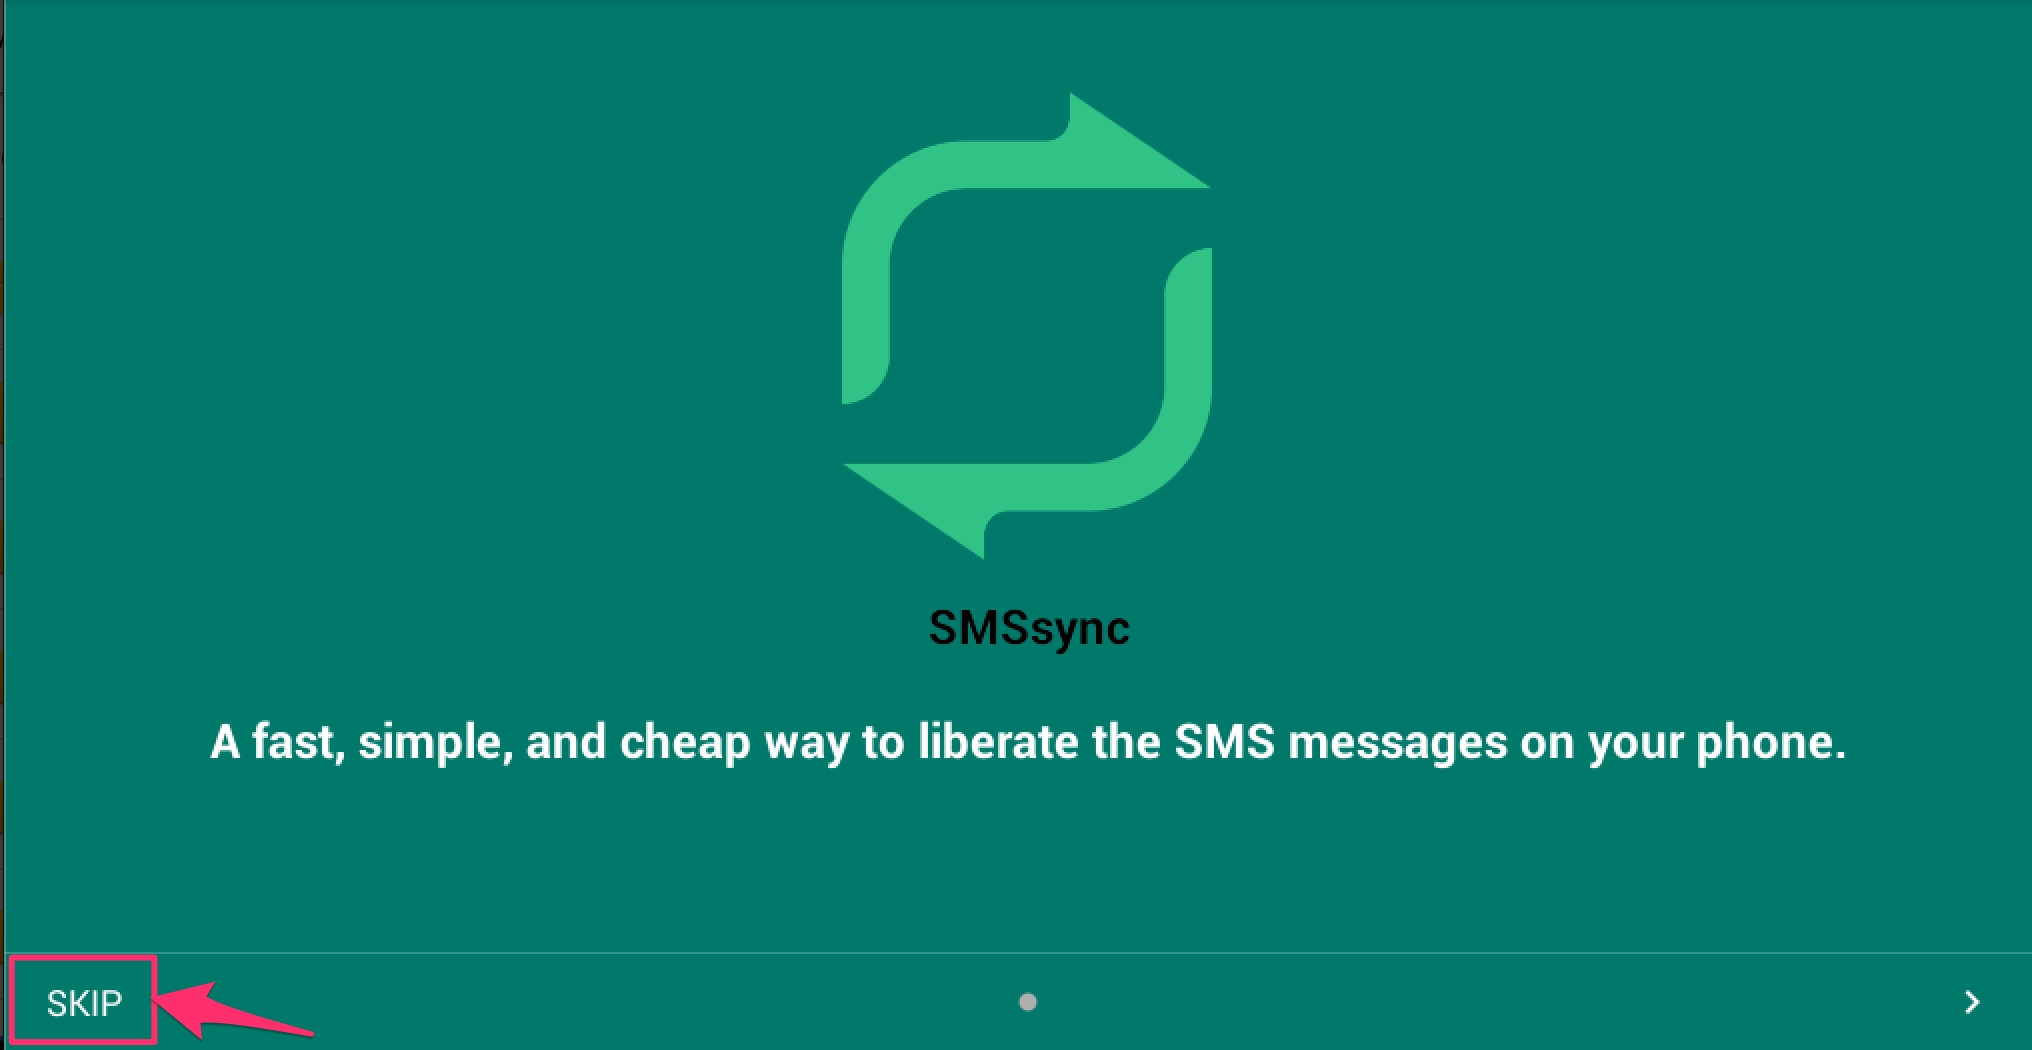
Open up the SMSSync Application on your android device, click skip or swipe left, and click done to continue.
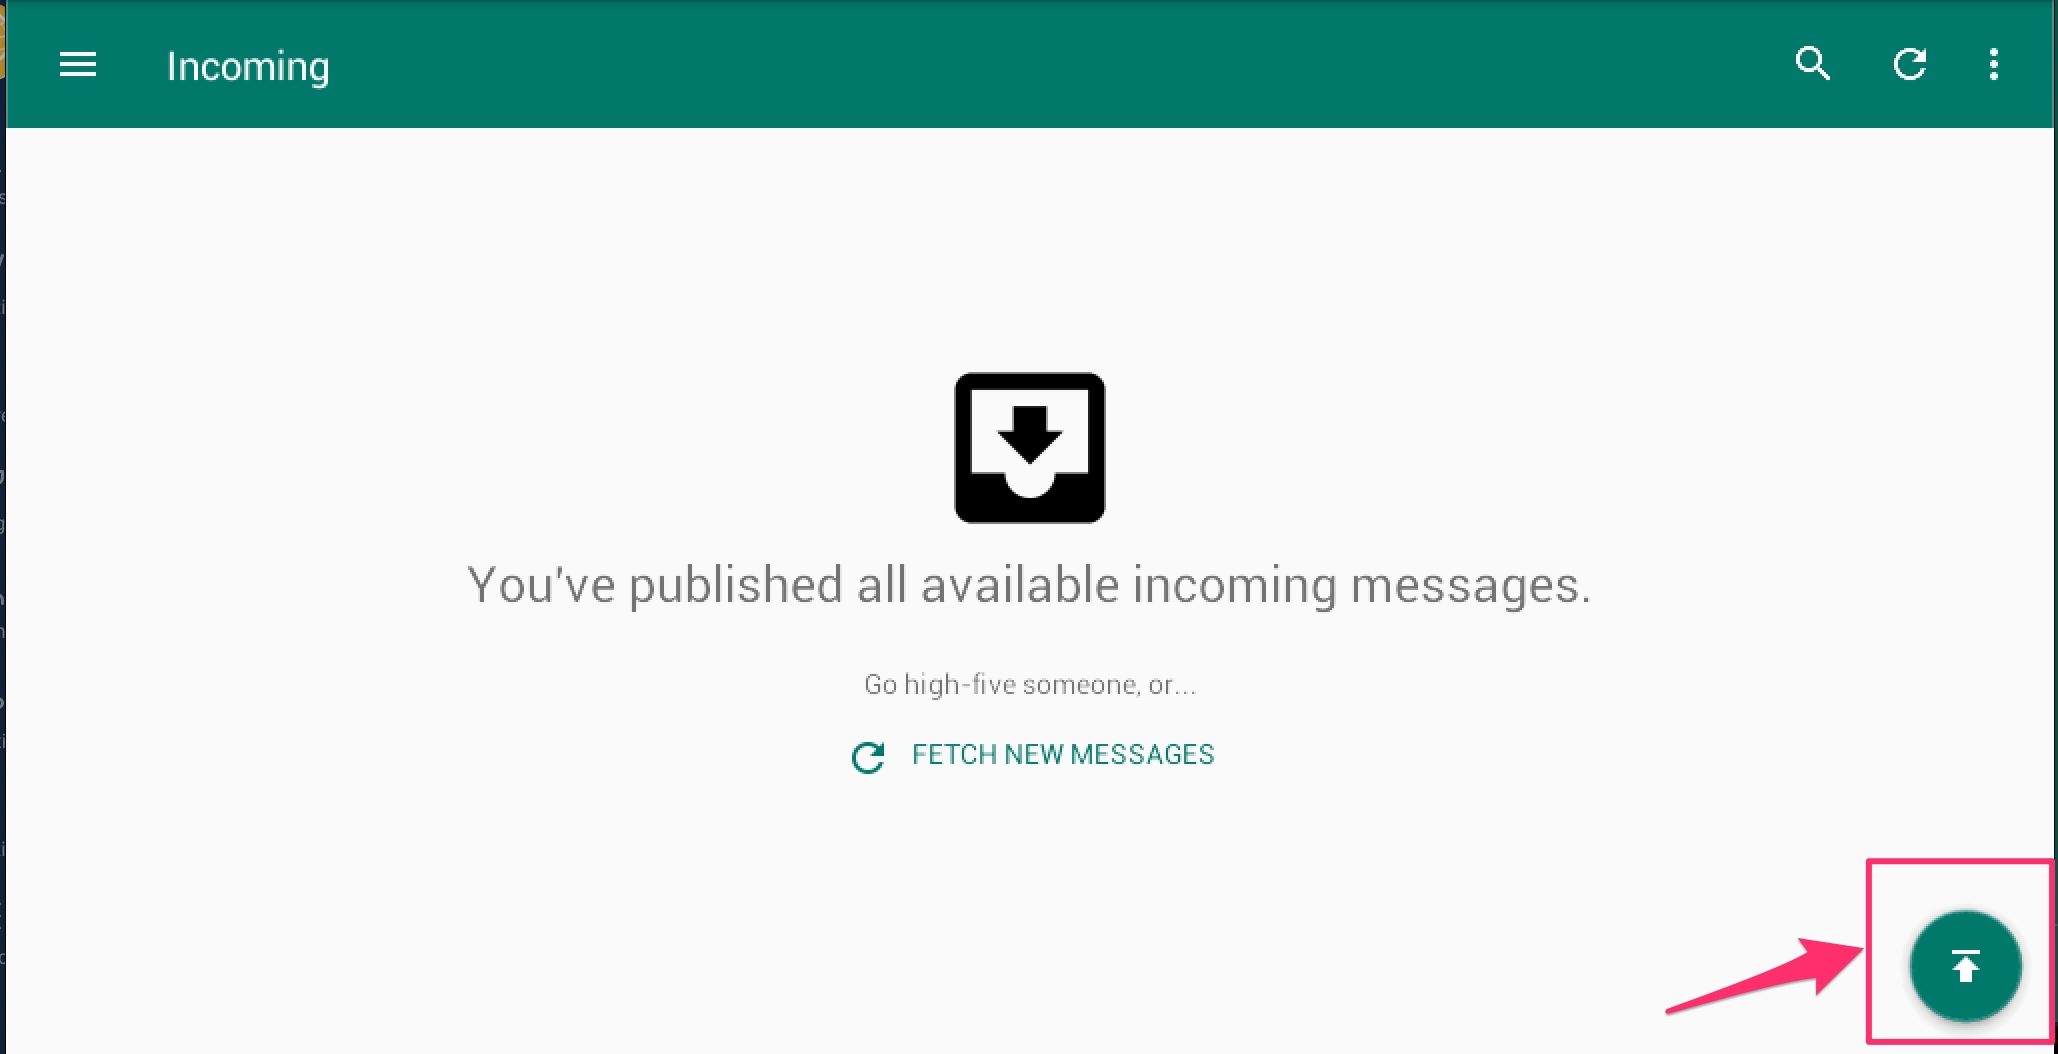
On the incoming messages screen, click on the arrow at the bottom right corner to enable SMSsync.
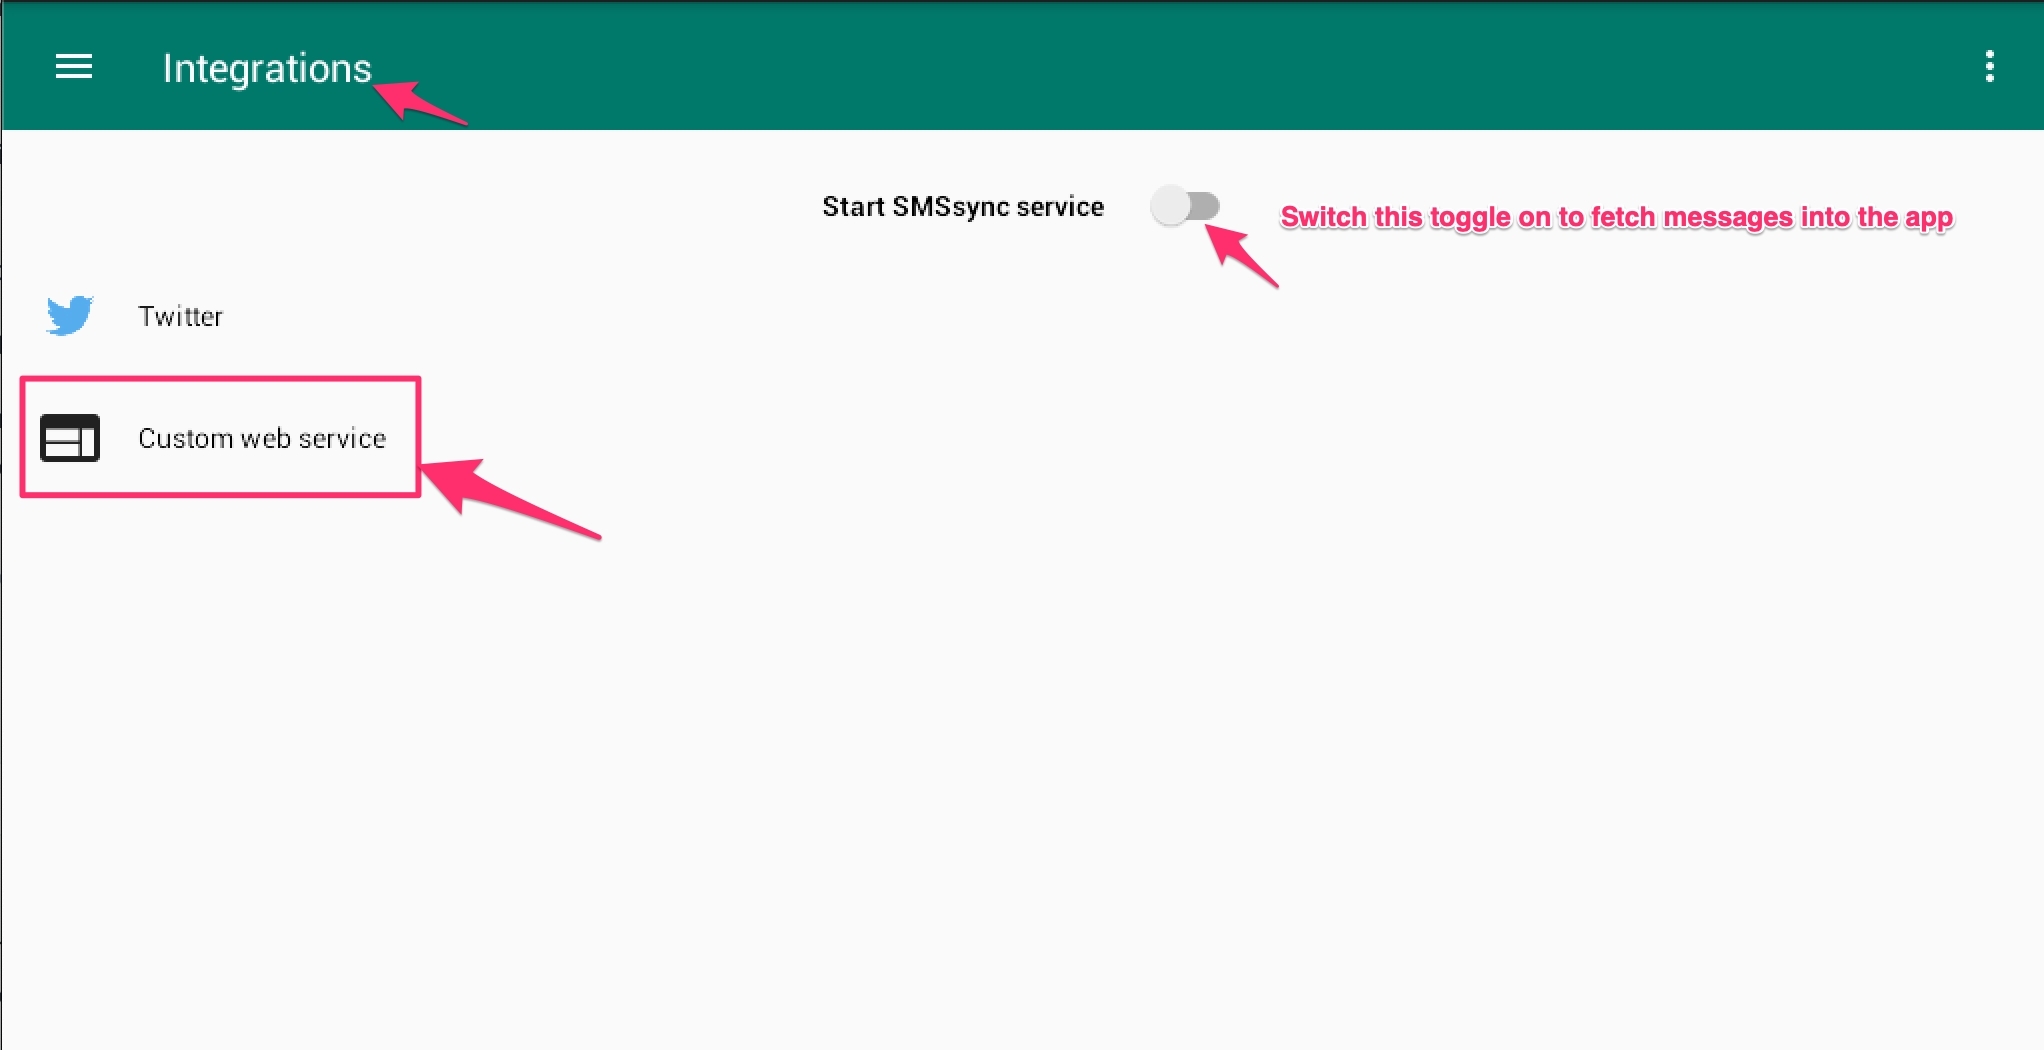
Once you have enabled SMSsync, you will be redirected to the integrations screen. Start the SMSSync Service to start fetching messages in your app.
Click on the custom web service to configure SMSsync with your deployment.
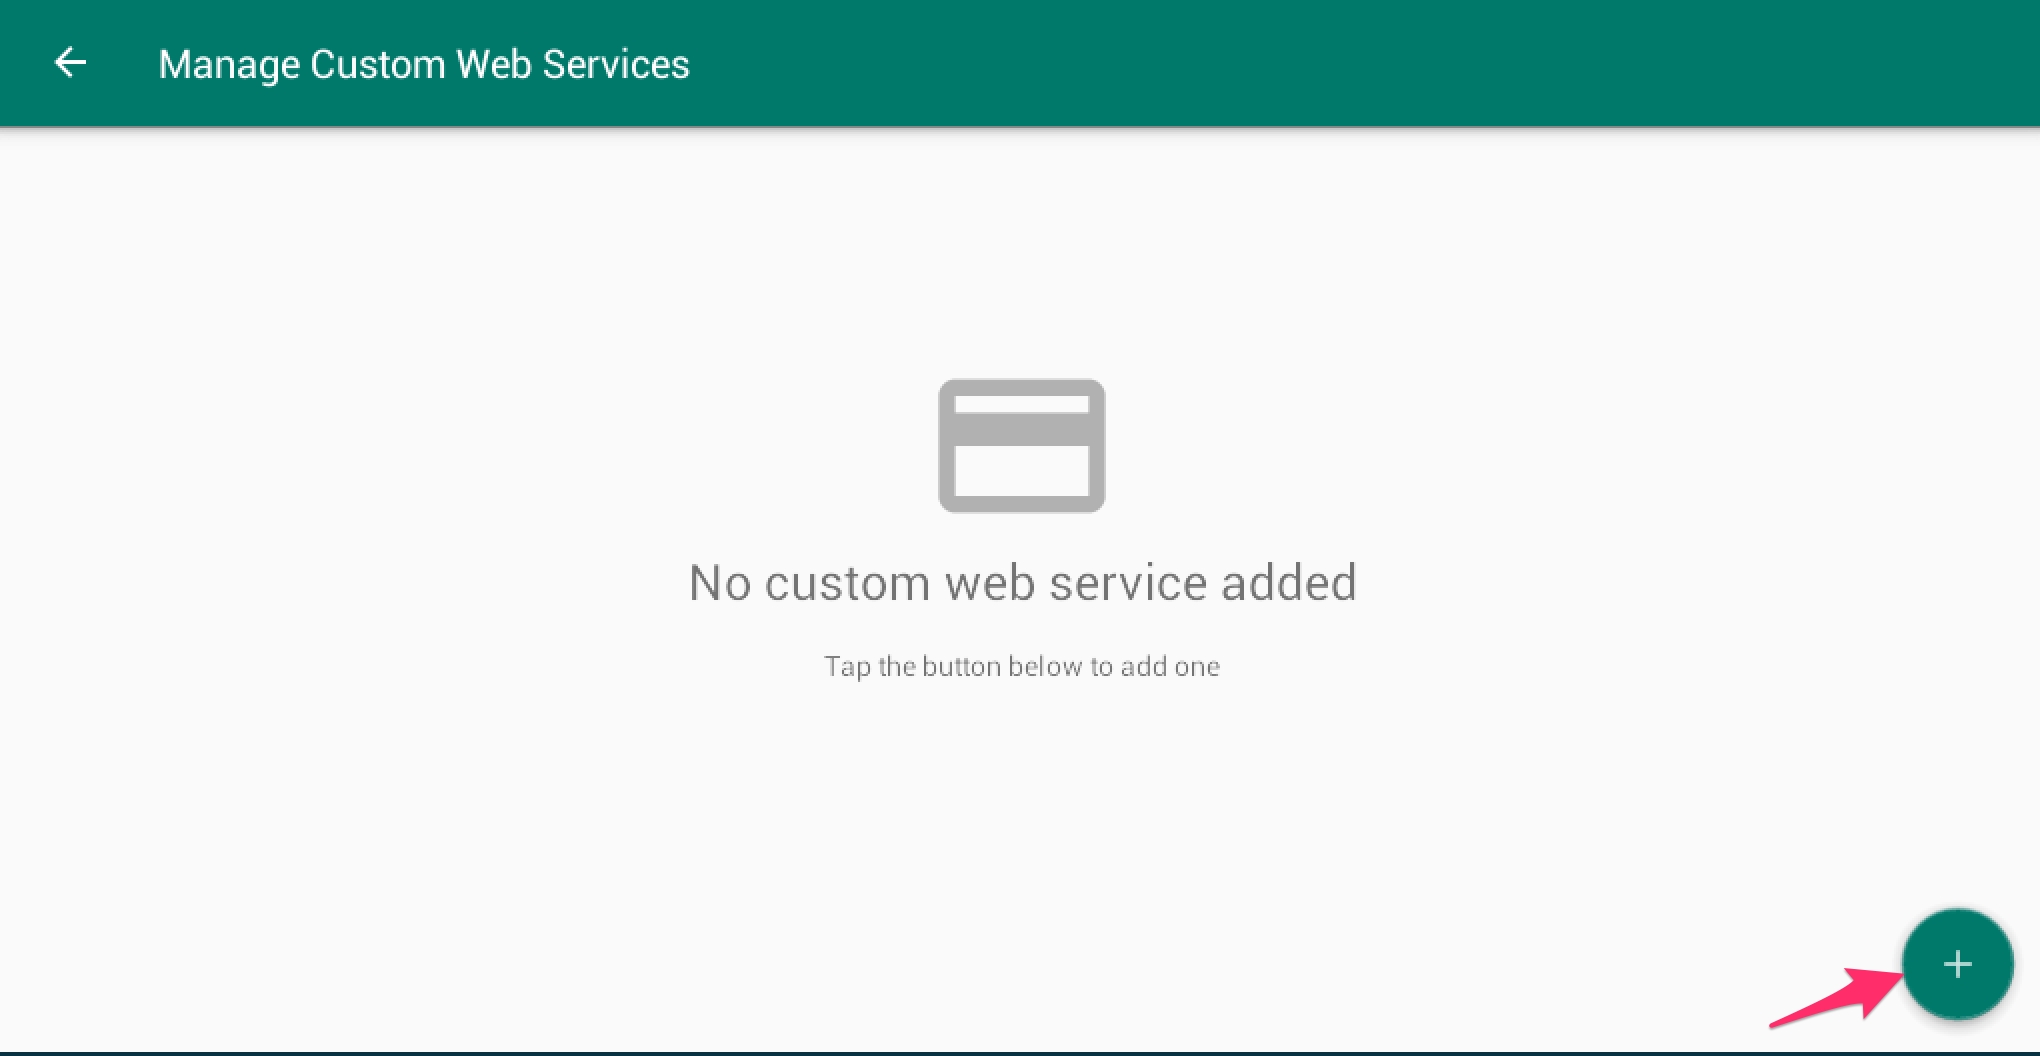
Manage custom web services screen will open, you’ll note that you can manage multiple Sync URLs on the app.
To add a new Sync URL, tap on the Add icon on the actionbar. An input dialog should open.
Open your deployment i.e name.ushahidi.io, go to datasource configuration in your setting page.
Click on the drop down icon on the right as shown
Follow the instructions given to you below.
You will need the Sync URL to configure SMSSync.
Set a SMSSync secret key for security purposes.
Click on Save.
To enable/disable this datasource , simply click on the green toggle to accept survey submissions.
Click on the toggle to import your messages' response to a survey.
Select the survey you wish to import your messages to.
Select which field should be assigned to populate the data from SMSsync.
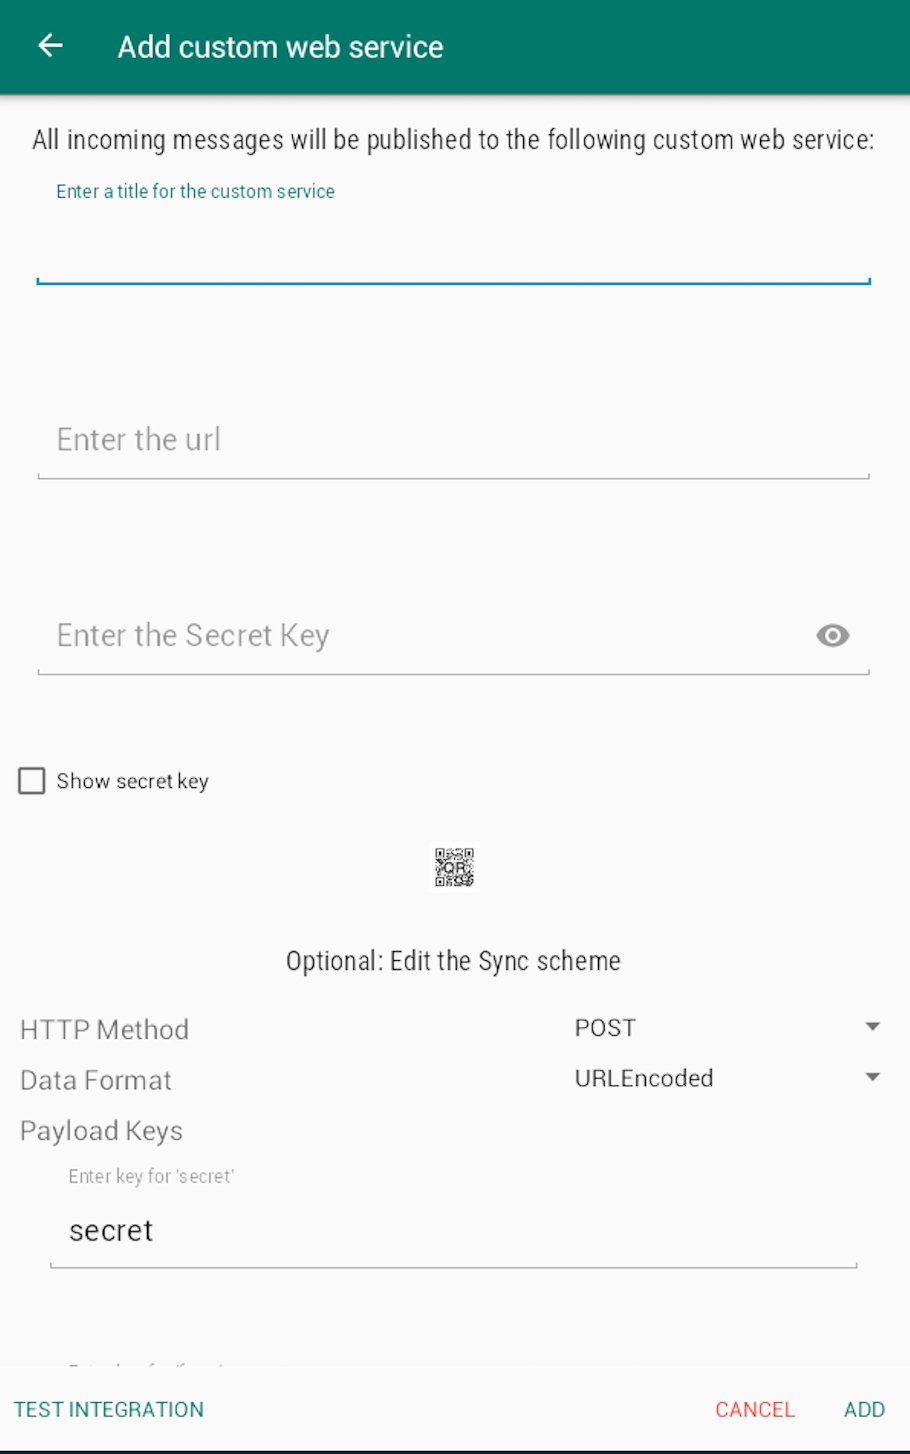
Go back to the input dialog on your SMSsync App and add the following details;
Title for the custom service: This can be the name of your deployment or any title you see fit
Custom web service Url: Enter the Sync URL in step 2 from your deployment as shown in the 'Android settings' image above i.e "https://yourdeploymentname.api.ushahidi.io/sms/smssync".
Secret key: Make sure you enter the exact key as the one you entered in your deployment android setting as shown in the 'Android settings' image above.
Once you enter your secret key, you are done with the configuration, do not change the rest of the settings.
Click ADD or test integration to save the new entry.
Nb:The secret key should be presented as string of any characters without spaces. Enter a comma separated value for the keyword(s). These keywords will be used by SMSsync to filter incoming SMS and pending messages to the Sync URL you are adding. As of v2.0.2. You can now add Regular Expression code for filtering. This means, it can either be CSV or RegExp. It cannot be both.
Note: Version 2.5 or higher supports basic auth credentials in the URL, e.g. https://username:pass@example.com/api-v1/add-record/.
You will now need to start the SMSSync Service to start forwarding messages to the platform. To start the SMSSync service
Make sure that you have added and enabled(checked) the Sync URL you added above.
On the integration screen, tap on the Start SMSsync service to start the service if you had not enabled it.
You should be all set to work with SMSSync and Ushahidi now. Unstructured posts via SMS will now be pulled into the platform.
If you’d like to edit your SMSSync configuration, simply click on the drop down icon on the right while on the data sources list page and make your changes.
For more details on how to manage messages within SMSSync, see configuration instructions on the SMSSync Website


This section allows you to configure Twitter as a data source, and subsequently pull unstructured posts from specific Twitter hashtags.
For you to be able to pull tweets based on hashtags, you will need to set up your Ushahidi deployment as an application on Twitter. To get started,
Click on the drop-down icon on the right as shown
Click on Create a new Twitter application. This will redirect you to https://developer.twitter.com/en
Sign into https://developer.twitter.com/en using your Twitter username and password.
Click on the Developer Portal to take you to the page where you will create your app or visit https://developer.twitter.com/en/portal/dashboard
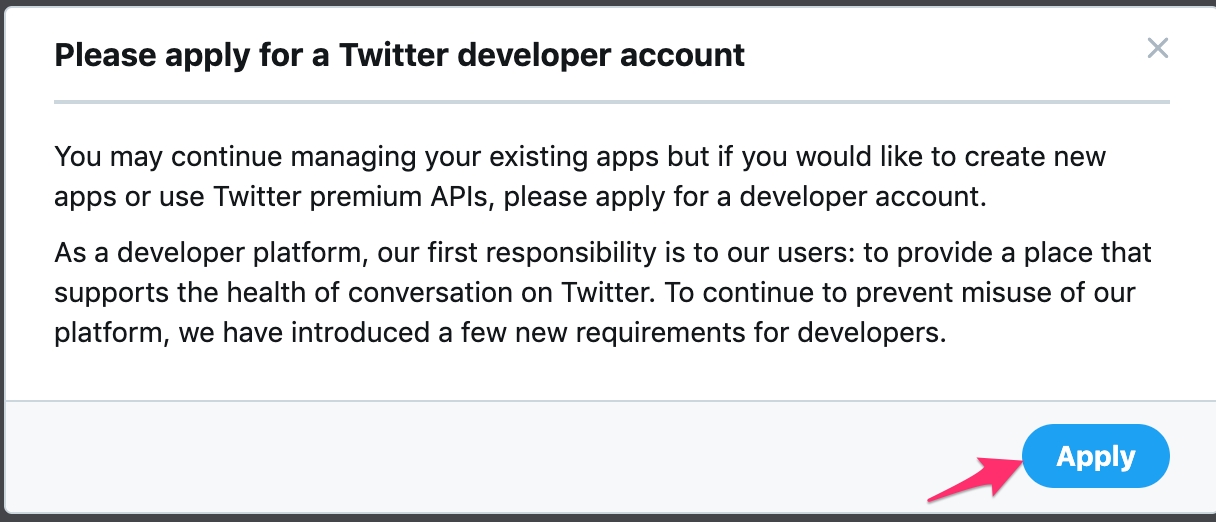
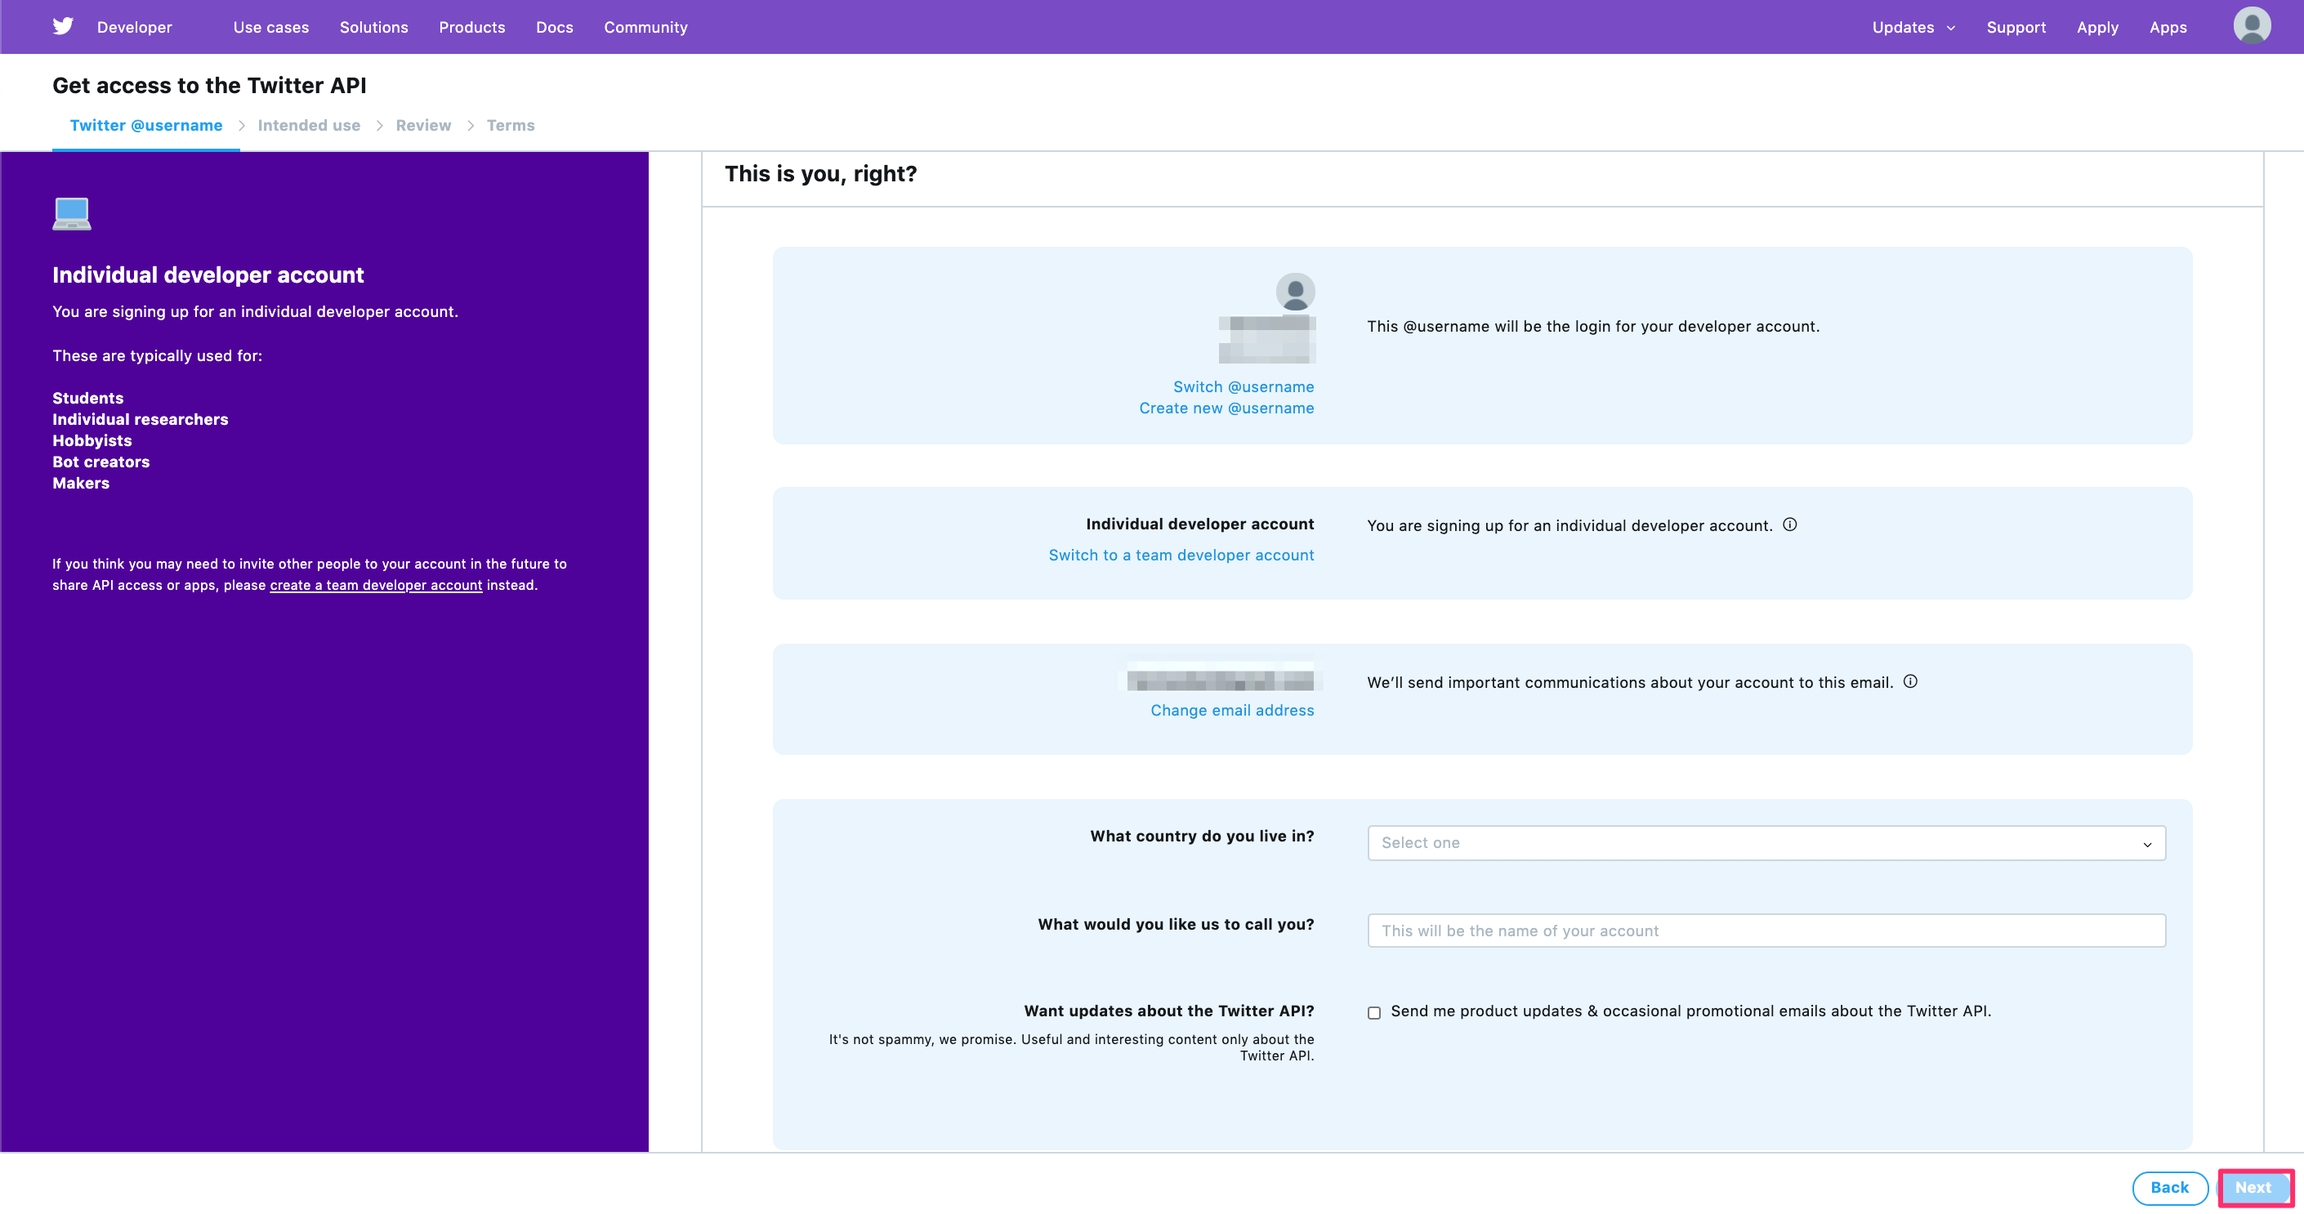
Once you select the Developer Portal, you will be directed to your portal immediately. If you haven't created a developer's profile yet, you will be redirected to sign up for one as shown in the picture below:
From here, you can choose either to Sign up for Free Account or choose one of the paid tiers to subscribe to. Note that the free tier limits the feature sets offered in these other paid tiers. Check their website for more information: https://developer.twitter.com/en/docs/twitter-api/getting-started/about-twitter-api
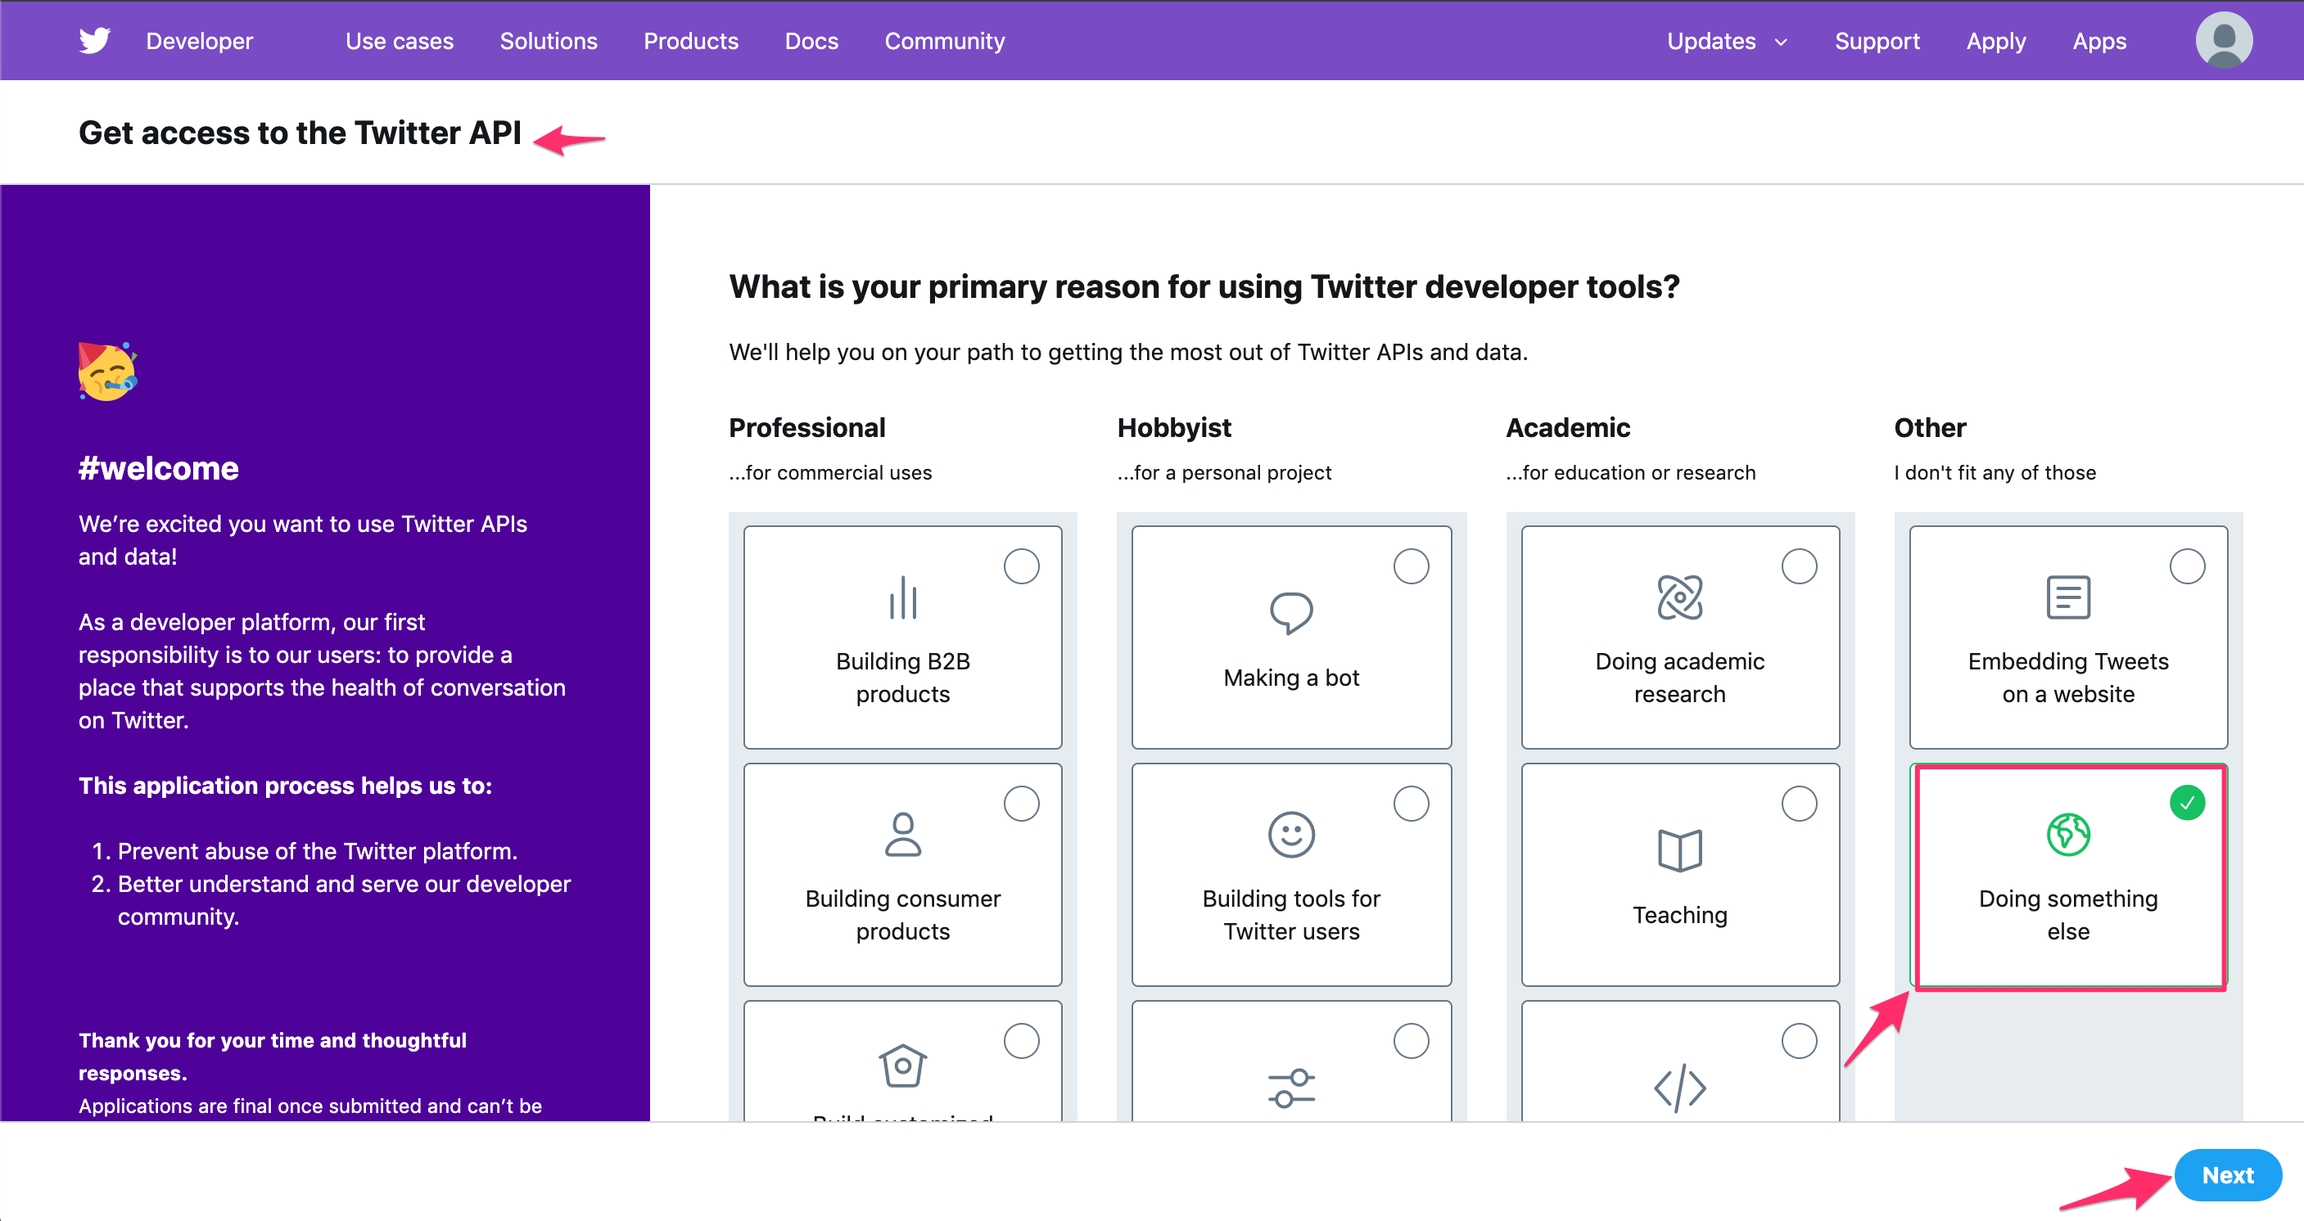
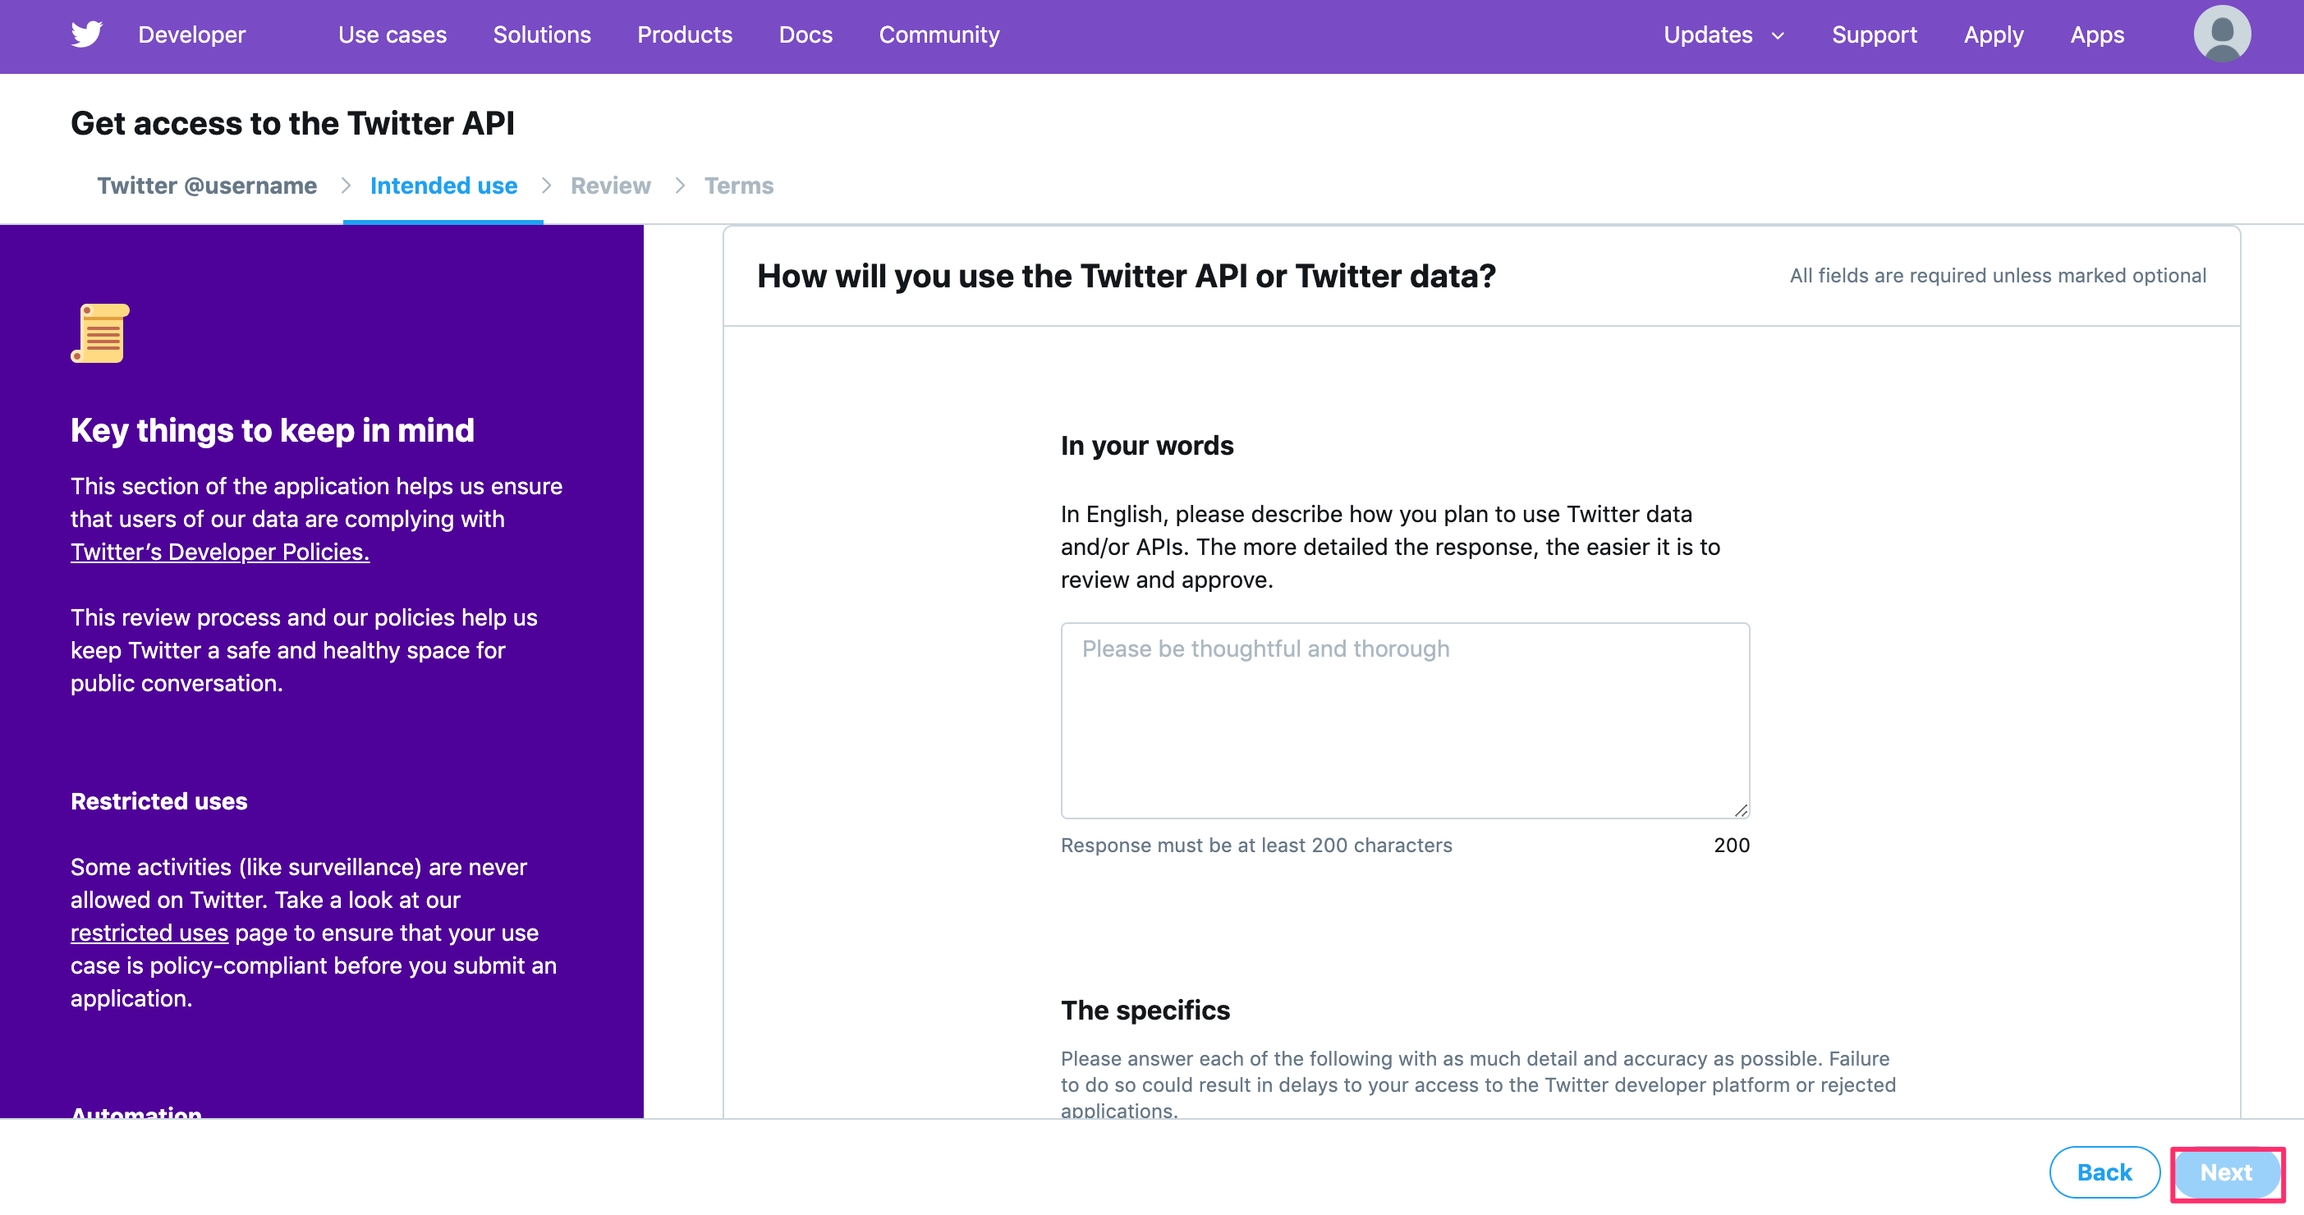
Once you select the option Sign up for Free Account, you will need to describe your use cases and also agree to the terms and conditions stipulated.
Once you have filled in your description and checked all the boxes, click Submit.
Once you click Submit, your developer account will automatically be created and you will be redirected to the Developer's Portal. Here, you will find out that Twitter/X has already created a project for you together with the app. You can proceed with this one, or you can delete the pre-made project and create yours afresh. If you decide to delete it, you can create a new one as shown below.
Once selected, you should give your project a name
Afterwards, select your use case for how you intend to use the platform
Provide a brief description of your project
Once you are done, you should click Next to set up your app.
To set up your app in this project, follow the steps below;
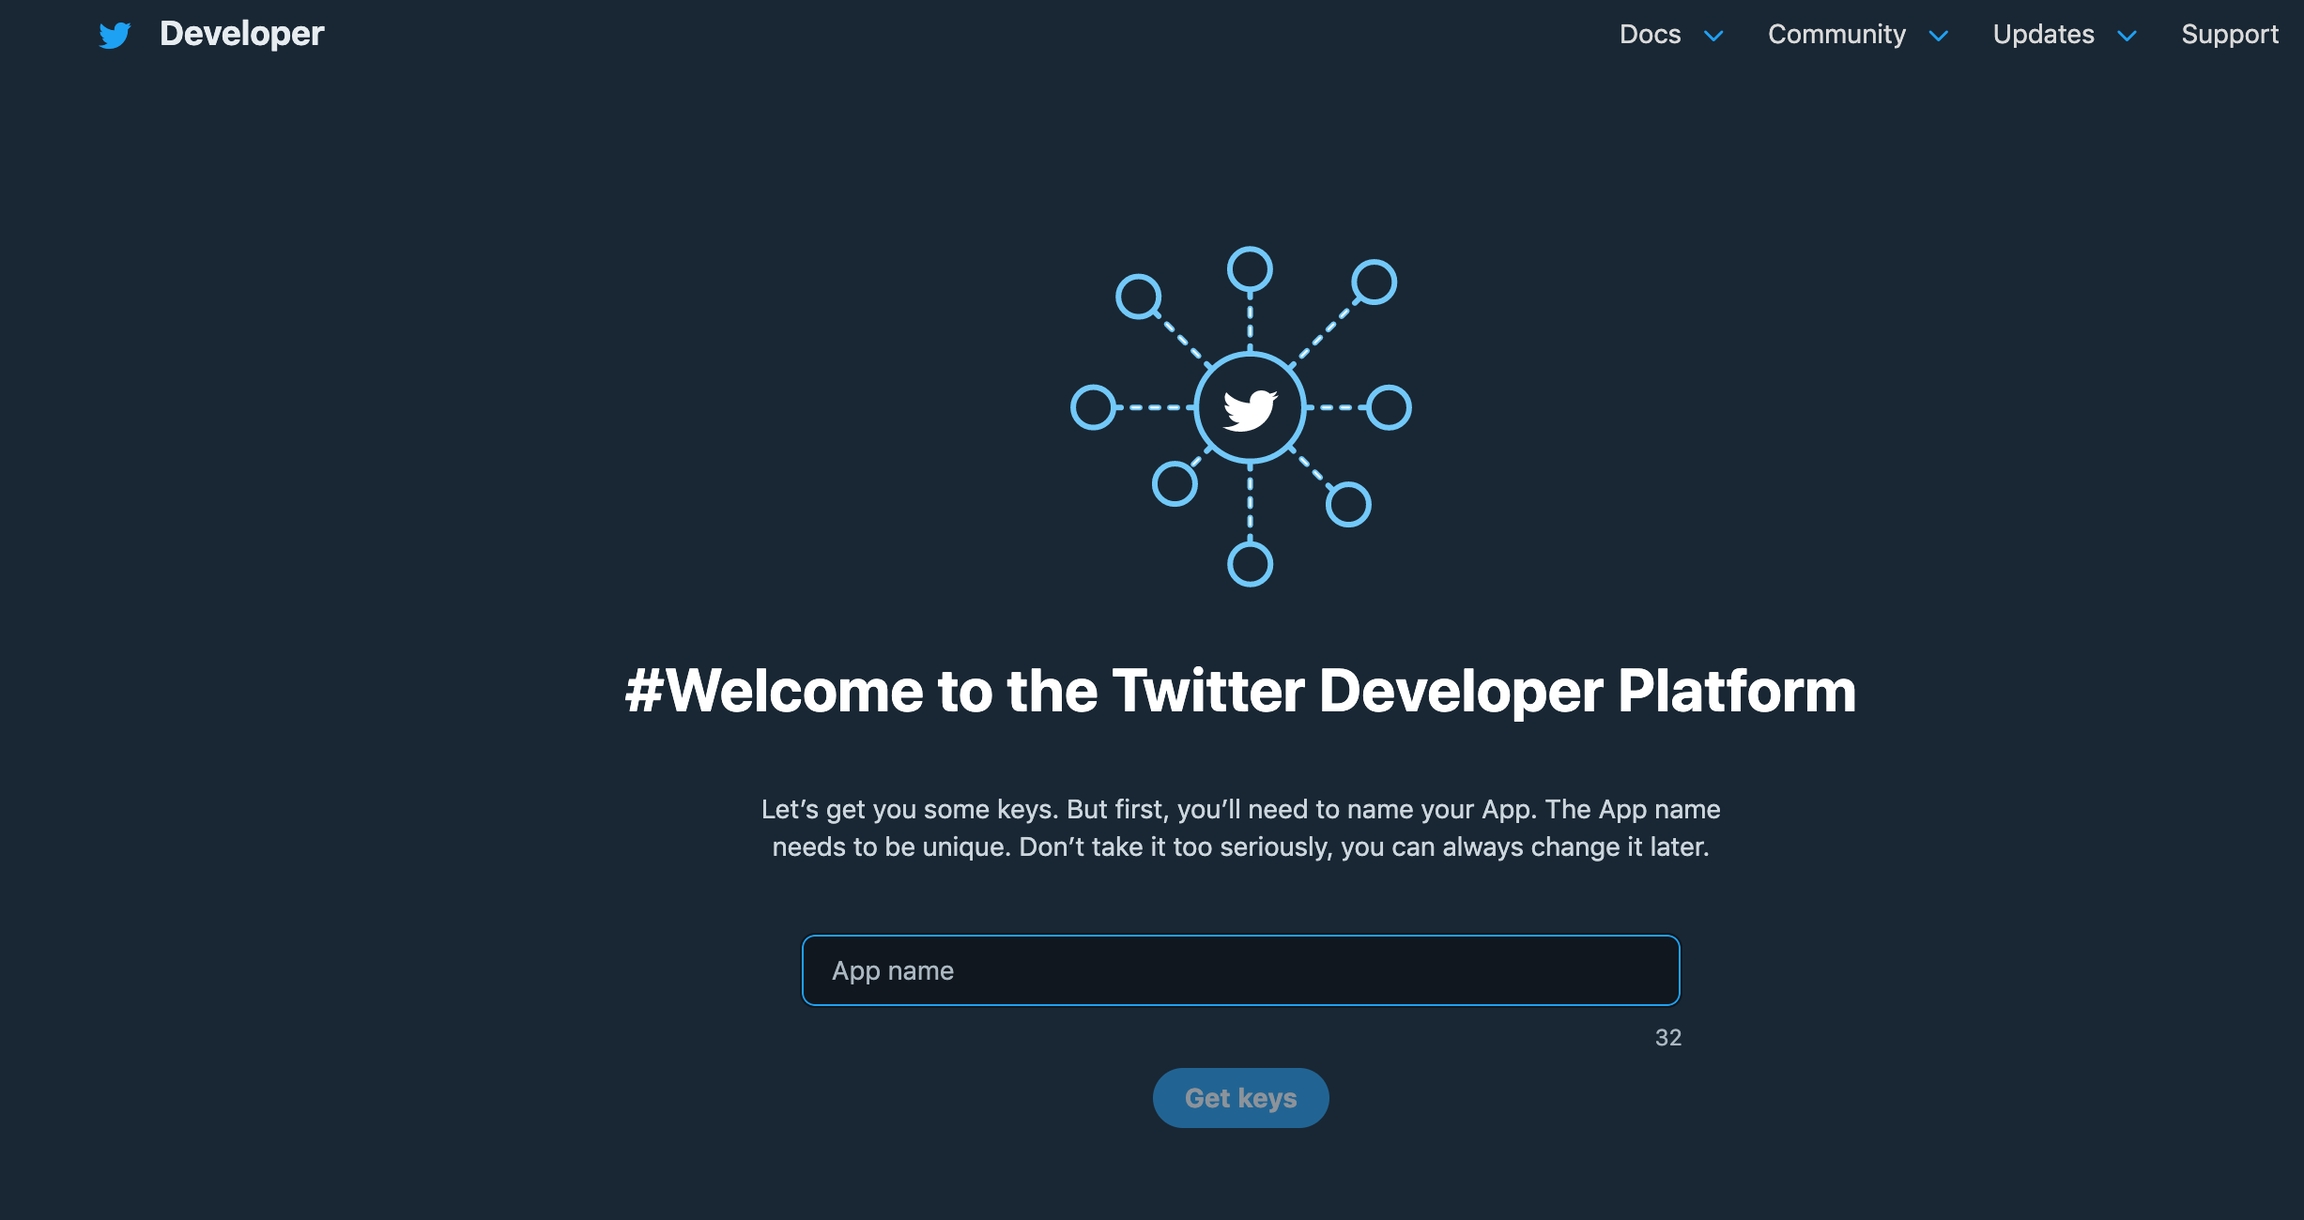
Select your App name.
You can enter the name of your deployment to make it more memorable.
Click on Next to generate your keys and token.
Here, you will see the API Key, API Key Secret, and the Bearer Token generated for your app. Make sure to master or note down these codes safely since you will use them when filling out the form in the Ushahidi Platform. These codes can be generated later on as we will see in the process down below. Keep in mind that regenerating these keys might need you to update your code for your app to work properly.
Note: The API Key and Secret Key are treated like passwords, therefore they should be memorized or saved in a secure location. If the security has been compromised/you forgot to save the keys, new ones can be generated.
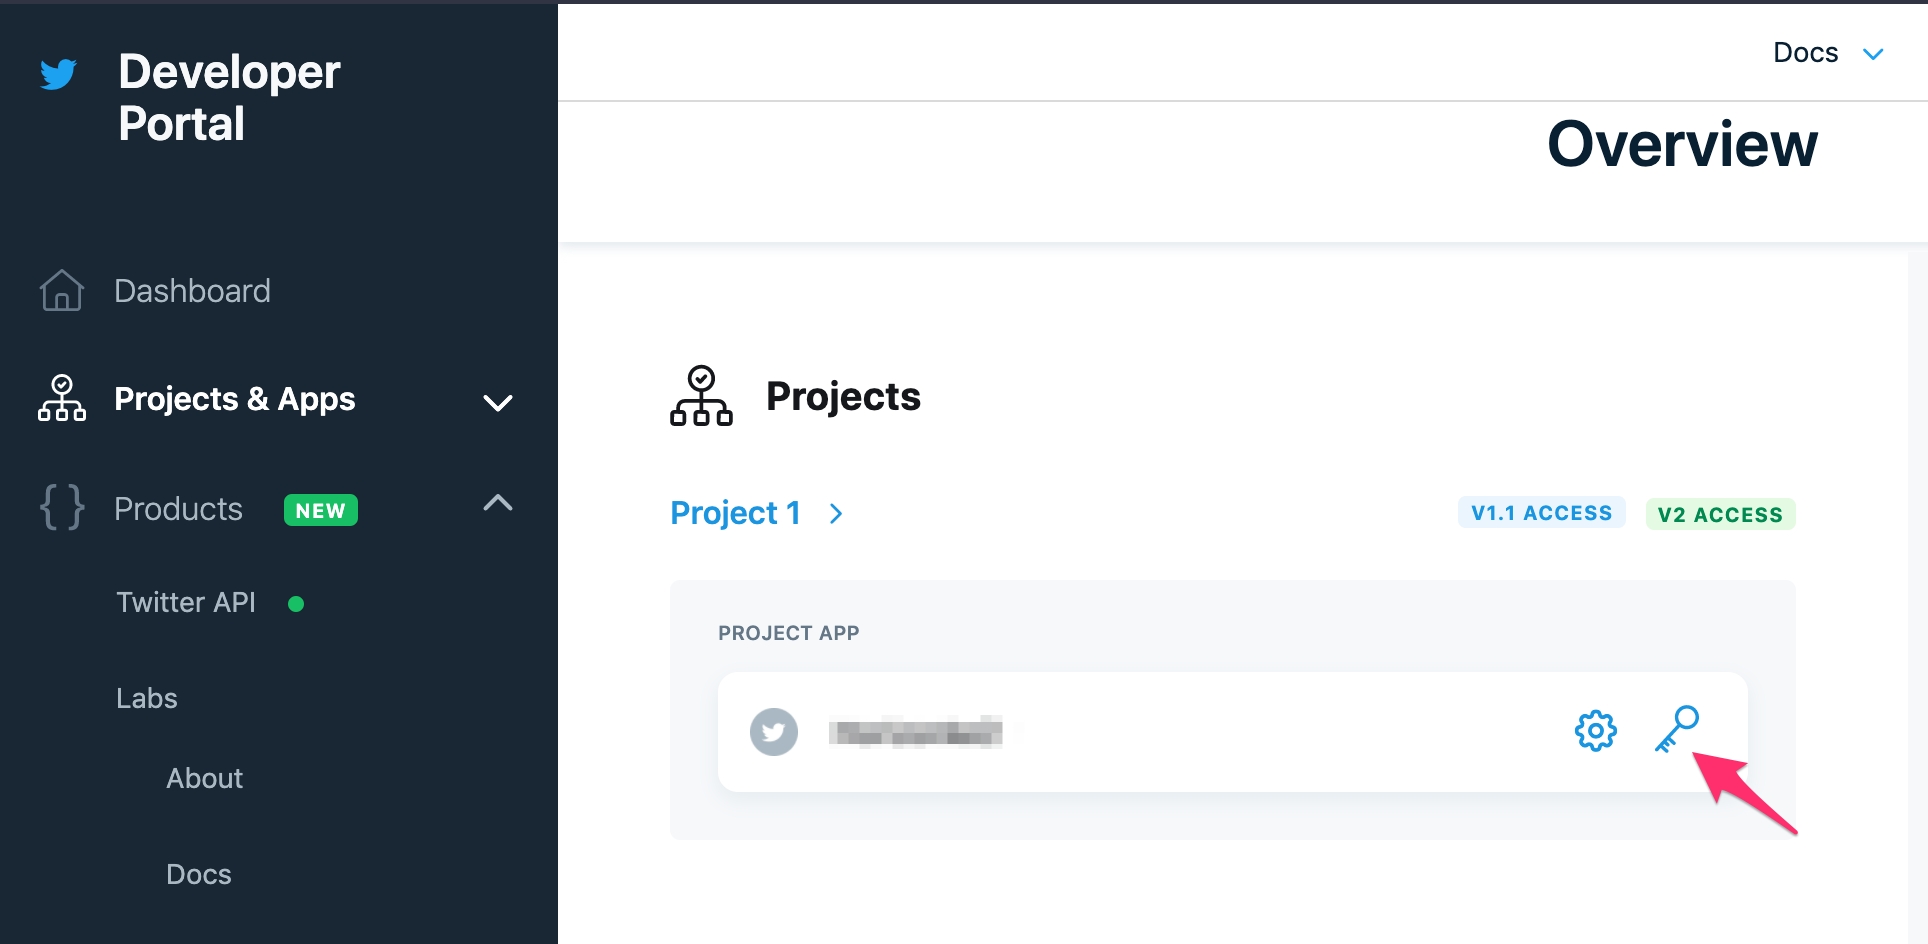
Go to Overview https://developer.twitter.com/en/portal/projects-and-apps, adjacent to your project app name, there is a Key icon, click on it to view your API and Access token keys. These will be needed to configure Twitter/X with your deployment.
You’ll get redirected to a page where you can grab details needed to configure your Ushahidi deployment i.e CONSUMER KEY, CONSUMER SECRET, ACCESS TOKEN, ACCESS TOKEN SECRET.
Go back to your Twitter configuration page on your deployment and fill in all the details from your Twitter app management page.
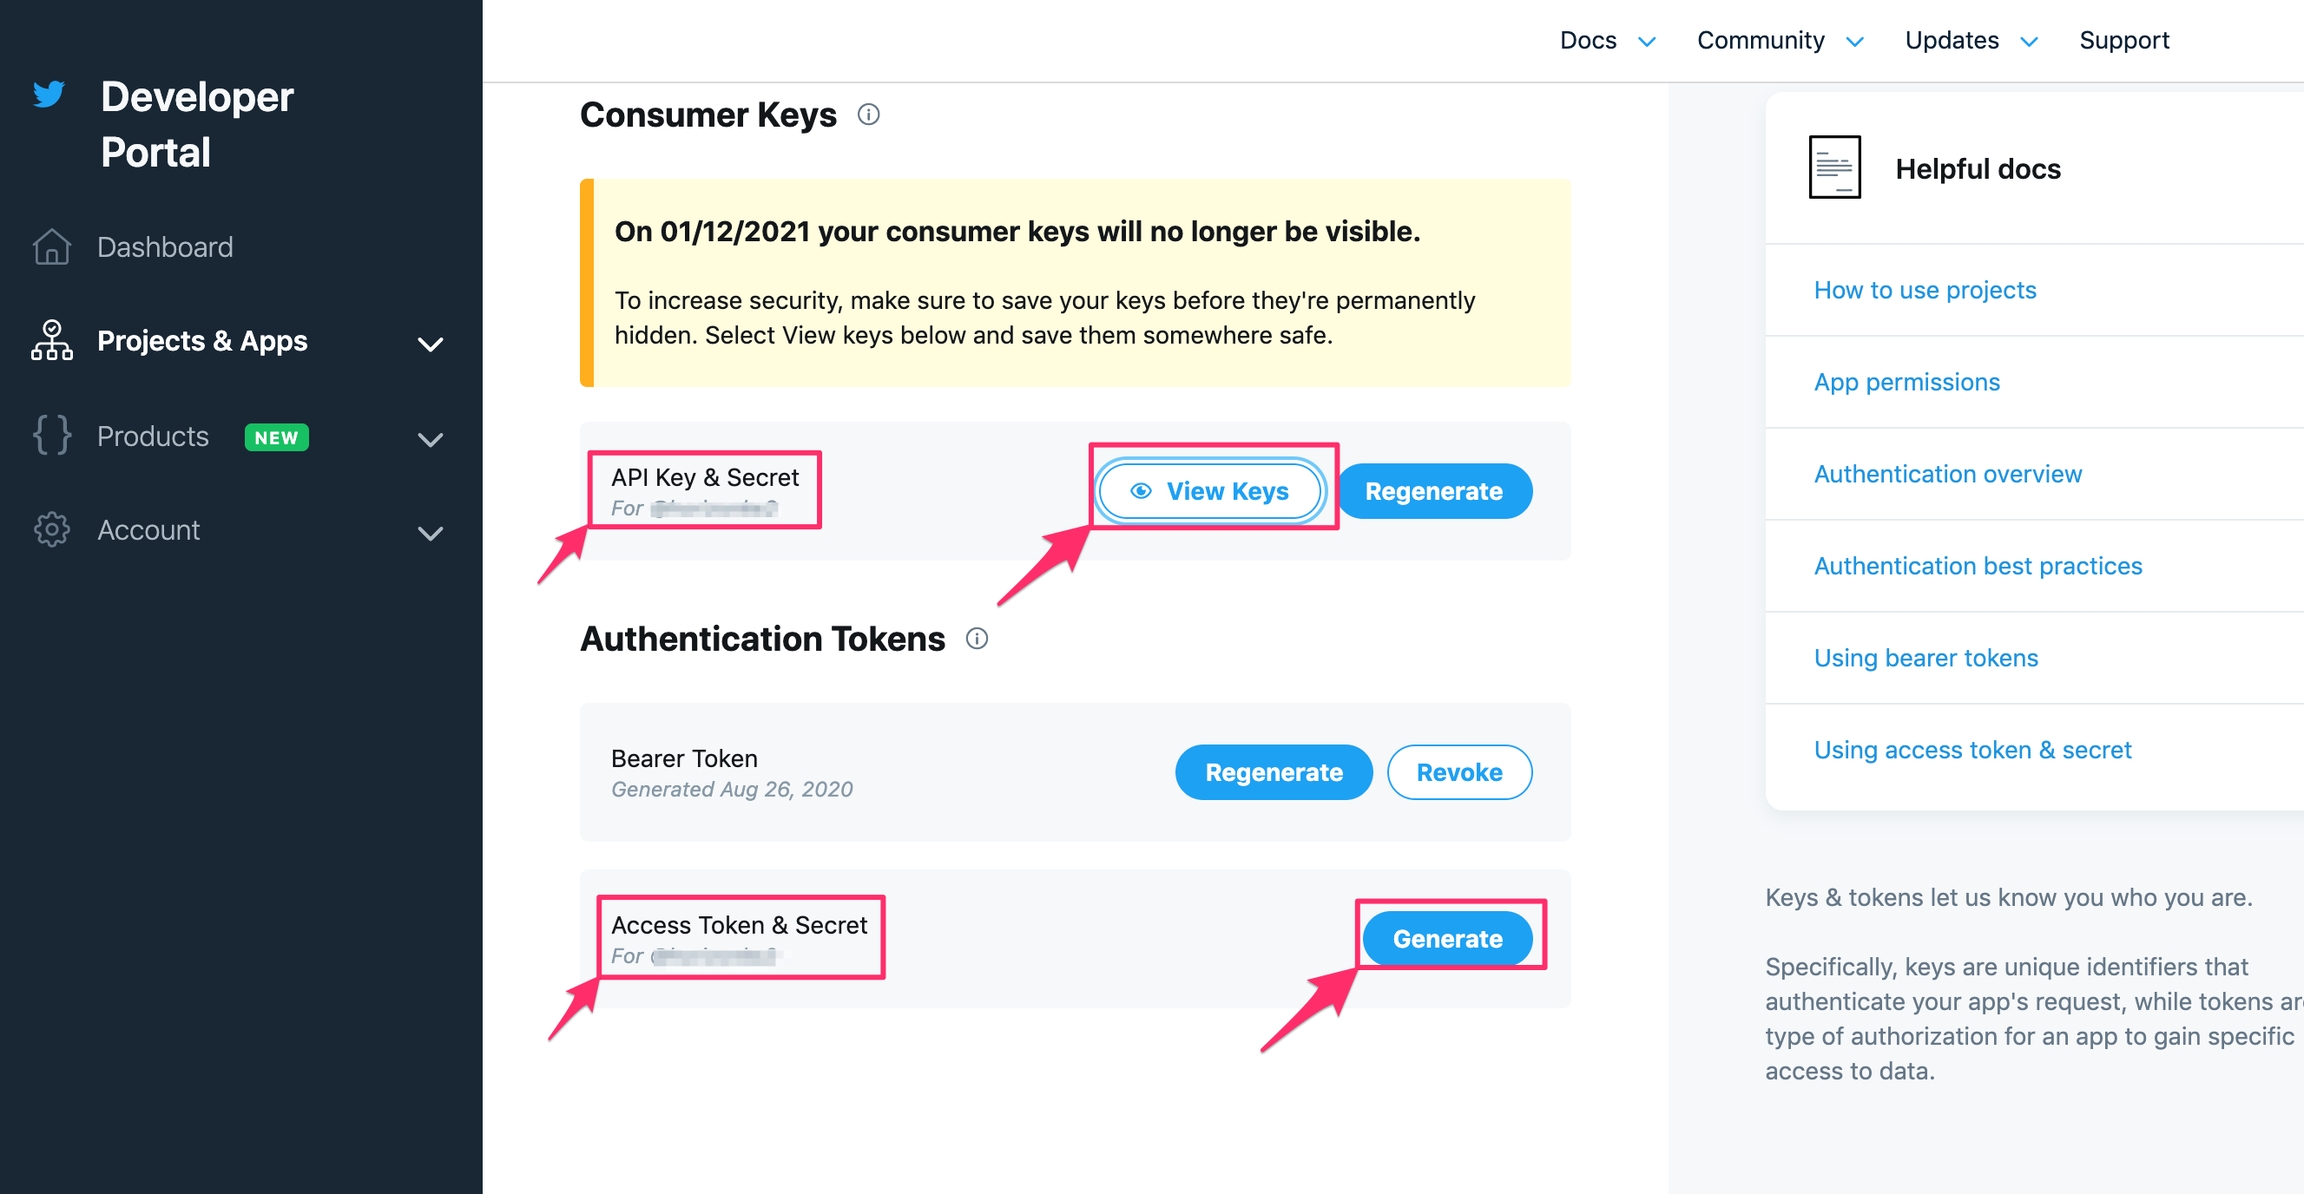
On your Twitter developer account panel, click on Reveal API Key hint next to API key and Secret to display a hint of your API Key. If you had not captured these codes before, you will be required to generate new ones. Copy and paste them on your deployment API and secret fields.
On the same panel, you will see Access Token and Secret. You’ll have to generate an ACCESS TOKEN and ACCESS TOKEN SECRET by clicking on the Generate button.
Copy and paste them on your deployment ACCESS TOKEN and ACCESS TOKEN SECRET fields.
NB: if you save them without copying and pasting, you will be regenerating new ones.
Add the hashtags you want to pull tweets from in the Twitter Search Terms section. You can choose more than one hashtag, separated by a comma. It is recommended that short and clear hashtags be chosen.
Click on Save and this data source’s settings will be saved. Unstructured posts from Twitter will now get pulled into the platform.
To enable/disable the Twitter data source, simply click on the green toggle.
If you’d like to edit your Twitter configuration, click on the Twitter option and make your changes. Once you are done click Save. You can also delete Twitter as a data source by selecting the delete button.
You can also choose which survey you want to import the data source into and you can toggle the option of accepting survey submissions from this source.
It will only take a few minutes and the tweets will appear on your deployment.
Data sources may contain outdated information. Work is ongoing to fix the content of this page.
There are many ways to enter posts into your Ushahidi deployment other than from the deployment itself. This section shows you how to configure all the possible data source types.
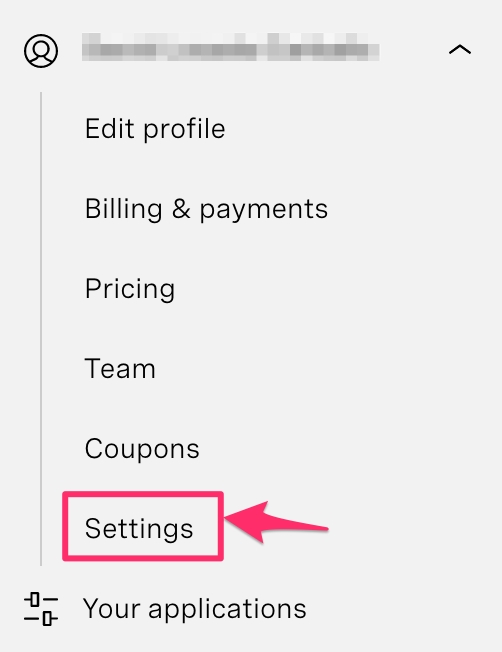
To access the data sources configuration page, on the sidebar, click on Settings
Then, click on Data Sources
You should get a full list of data sources as shown below
In this section you will learn how to configure different data sources to your Ushahidi deployment.
The general settings page allows you to set the basic appearance of your deployment. To access General Settings, do the following.
On the sidebar, click on Settings
This will take you to the General Settings. You can always click on the General card to take you back to this page if you move on to some other settings page.
Add the following details to the form on the page
Site Name: This changes the main title of your deployment, and is typically the title of your project. You can change this at any time.
Site Description: This tagline appears below your deployment name, and should be a one or two sentence overview of what your deployment is about.
Deployment logo: Your deployment logo will appear on the right hand sidebar on your homepage, under your deployment name and above your deployment description. If you’d like to remove it once it has been added, just hit the Delete Logo button
Contact Email Address: This optional contact email will be displayed publicly to visitors of your deployment.
Site Language: You can update the default language of your deployment. This will update the labels within your user interface, and will update the layout of the deployment if you select a language that reads from the right to the left.
Private deployment: Ticking this checkbox makes your deployment and it’s data only accessible to registered users(with the correct privileges) on your deployment, who must sign in for access.
Disable user sign up: Ticking this checkbox disables the registeration feature preventing people from signing up into your deployment.
API key: This is used by developers who wish to integrate their tools with the Platform API. If you are not planning to do this, this should not affect you. To learn more about this, look at this doc.
Configuring map settings
You’ll also need to configure your map settings from this page. Your map settings allow you to select the type of base map you want for your project. You can configure the following:
Default base layer: Currently, the platform only offers Openstreetmap as a map provider. Plans are being made to add additional map providers.You can choose between the map, satellite and humanitarian views. This will determine the style your map will display as on your homepage.
Default latitude and Default longitude: Dragging and dropping the blue pointer on the map automatically fills in these two fields. In the event that you have latitude/longitude values, you can also type them in and the pointer on the map will automatically update to match the points entered.
Default zoom level: Zooming in and out of the map using the small menu bar on the left top hand side of the map will automatically set a value in this field. You may also optionally set the zoom level by manually adding a figure in this field and your map will update to match.
Combine nearby posts: This checkbox is checked by default, meaning that posts near each other will be bundled together and denoted as a single point on the map with a number to show how many posts they are. If you uncheck this option, each post will appear as a single point on the map.
Map Precision Level : This allows you to indicate the level of exactness for locations on the map.
Log in: If your deployment URL is my-deployment.ushahidi.io, Click on the Log in link in the sidebar of your deployment as illustrated below.
Password and registration:
For Open Source deployments, the default install will create a user admin, with password admin123. Be sure to edit this user’s password once you’re logged in.
For ushahidi.io deployments, enter the email address and password you used to register your deployment, and the password
Note: You can use EITHER an email address OR username with a corresponding password to log into your deployment.
If you don’t have an account already, you can create one by clicking on Sign Up and filling in the required details.
When you create a deployment you become an admin by default, but if you are another member with access to the same deployment, you’ll will be able to log in and perform basic actions on the platform, but won’t have much privilege within the platform until an administrator upgrades your access level.
Once you’re logged in, you can access and change your account details at any time. To do so, click on your account favicon at the top right hand corner of your deployment as illustrated below.
A pop up will appear on your screen once you select Account Settings. Make changes to your profile as desired, then click on Save & Close
As a registered and logged in user, you can set up notifications on Saved Searches and Collections. This means that any time a post is added to a saved search/collection, you will receive an email or phone notification - the notification feature is still in development on the mzima platform.
You can manage(turn these notification on or off) by:
Clicking on your account favicon at the top right hand corner of your deployment as illustrated below.
Then, Click on Notifications tab from the modal popup.
A list of all notifications you’ve signed up for will appear, with the option of turning them on and off. You’ll also be able to determine the email address or phone number through which you would like to receive notifications. You must have SMS configured to enable.
You can also add additional contacts to receive notifications via email/phone.
To log out of your deployment, click on the log out icon at the top right hand corner of your deployment as illustrated below.
You should be successfully logged out of your deployment, and redirected to the homepage.
This data source is not available in your deployments. You will not find it in your settings, please reach out to support@ushahidi.com or our chat messenger to enable it in your deployment.
This section allows you to set up the platform to receive and send emails through a connected Gmail account via the API. Before getting started, make sure that you have an email account set up on Gmail. Note: If you're self hosting the Ushahidi platform, the Gmail Provider makes use of the server-side flow when making a request to Gmail API, and must be authorized using OAuth 2.0 Credentials.
Follow this guide to create the OAuth 2.0 Credentials (Client ID and Client Secret) with Gmail. Keep in mind:
Select "where you will be calling the API from" as Other UI.
Select User data as the data type to be accessed.
Select your application type as TVs and Limited Input devices.
There's a need to set up a consent screen.
To get started with Gmail set up on the Ushahidi platform, click on Gmail from the drop down as shown below.
Input the following email account settings
Email Address: Enter the Gmail address you will be receiving and sending emails with.
Fetch Email From: Pick the date you want to start fetching messages from.
Client Id: Enter the Gmail client id gotten from the OAuth credentials.
Client Secret: Enter the Gmail client secret gotten from the OAuth credentials.
Redirect URL: Enter the redirect URL from the OAuth credentials. The default value set here is urn:ietf:wg:oauth:2.0:oob and in most cases should be left this way.
Click on Save and this data source’s settings will be saved.
The below setup will be available to both the hosted and self-hosted users.
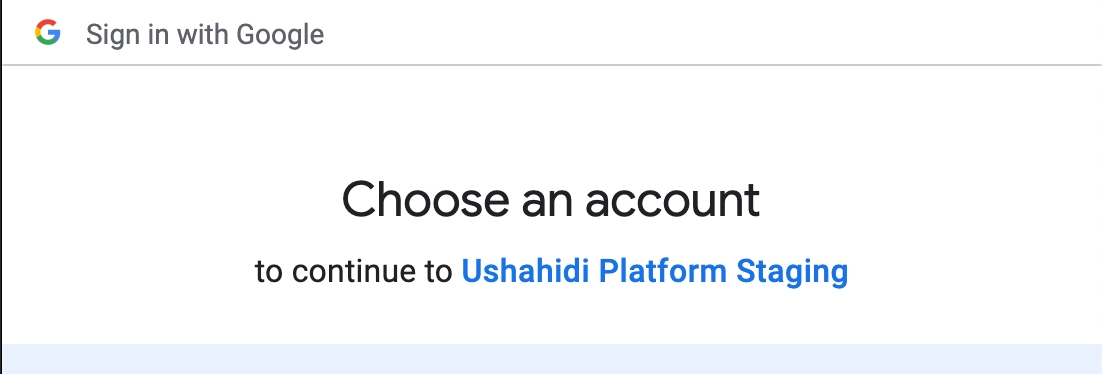
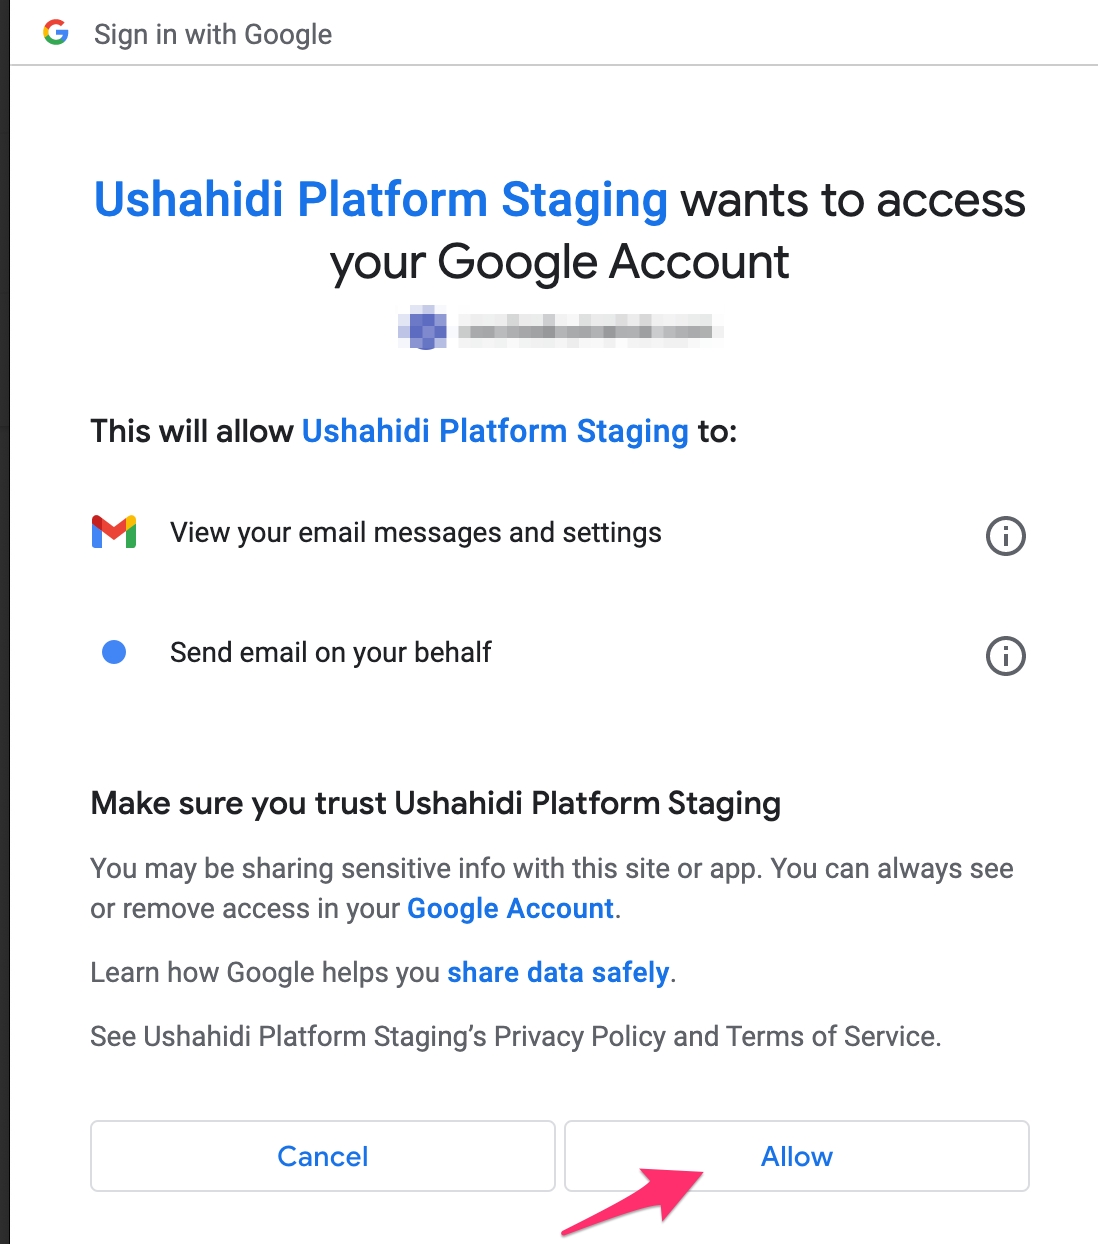
Next, Scroll up and click on Connect your Gmail Account and this will show a google prompt to authenticate your Gmail account.
Follow the prompt through and click on Allow to be presented with the list of Gmail accounts that you have.
Grant permission by selecting the Gmail account that you would like the Ushahidi platform to access.
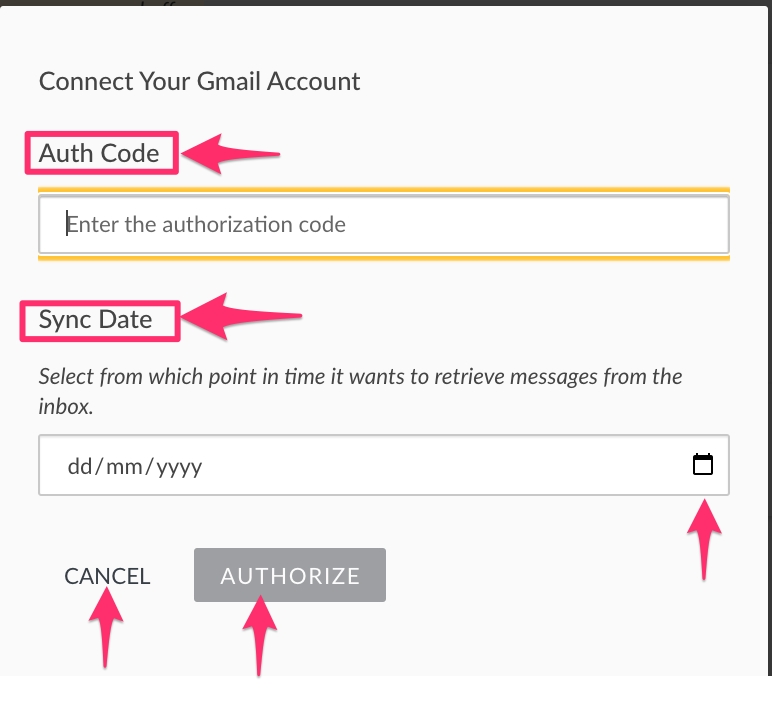
This will display an auth code.
Please copy the provided code, switch back to your Ushahidi application, and paste/enter it on the opened modal:
Enter the point in time that you would like the Ushahidi platform to fetch messages from your inbox.
Click on Authorize to save the auth code and date entered.
A message will be displayed in your deployment to indicate that your account is connected, messages from Gmail will now be pulled into the platform via the API.
To disconnect your account, simply click on Disconnect your Gmail account to stop all messages from being fetched from your inbox.
NB: All messages that were previously fetched will not be deleted from your deployment.
To enable/disable the email data source, simply click on the green toggle and click on save.
A survey defines critical aspects of a post’s structure and permissions. For example, a post’s “survey” defines which fields are available for contributors to complete, and who can see it when it’s published.
This section will show you how to create and manage surveys on your deployment.
The setup in this guide is demonstrated in the below video as well. You can watch and follow the guide at the same time!
Before configuring the survey on your platform, you'll need to install Ushahidi's platform and set up your deployment. You can complete this task by referring to the following resources:
Make sure you are logged in to your deployment page.
To access the Surveys configuration page, on the sidebar, click on Settings
Then, click on Surveys
By default, each deployment has a Basic Post survey, which can be deleted or modified as needed. To create a new survey:
Click on Add Survey as shown below.
In the upper right corner of the survey form, you will see the default language that your deployment is currently in. Check Chapter 3.3.2 on how to change a survey's default language
Fill in the required details:
Survey Name: Try being as specific as possible when creating your survey name so that users will understand what they are selecting when creating new posts
Description: Provide a brief description of what kind of data you’ll be collecting with this survey
Fields + Tasks: See below for details on how to add fields and tasks into your survey.
Click on save once you're done building your survey.
See chapter 3.3.2 on how to translate your survey
To duplicate a survey
On the surveys settings page where you have a list of surveys:
Click on the bulk actions button
Check/select the survey(s) you would like to duplicate
Then click on the duplicate button or icon.
Each survey you create will have a title and description field by default. It's important to note these fields can be edited, but cannot be deleted.
Short Text: Short Text field is designed for brief, single-line responses—typically a sentence or less. This field is particularly useful when you need concise information.
For example, in a flood report survey, you might ask a simple question like: "What is the estimated water level during the flood?" Here, a Short Text field would capture specific, brief inputs like "3 feet" or "1 meter."
Long Text: Long Text field is ideal for capturing more detailed responses, such as paragraphs or multiple sentences. This field is perfect when you expect users to provide in-depth feedback or explanations.
For example, in a flood report survey, you might ask: "Can you describe the impact of the flood on your home and surroundings?" In this case, the Long Text field would allow respondents to give a detailed response like: "The flood caused significant damage to our home. The water reached the first floor, destroying furniture and appliances. Roads were also submerged, cutting off access to emergency services for several days."
Number(Decimal): This field is designed to capture numerical inputs, which include decimal values. This field is useful when precise numerical data is needed.
For example, you might ask: "What was the total cost of flood damage in dollars?" Here, the Number (Decimal) field ensures respondents can enter exact monetary figures like 1500.75, making it easy to record detailed financial data.
Note: Number will not accept any kind of alphabet and Special symbol for example $.
Number(Integer): The number (Integer) field is designed to capture numerical inputs, which are whole numbers. This field can be useful for the answer which will obviously be a whole number.
For example, you might ask: "What is your age?" Here, the Number field ensures respondents can enter the whole number as inputs.
Note: Both Number (Decimal & Integer) fields don't accept digits greater than 10, so respondents cannot add country codes if the field is requesting phone numbers.
Location: This field allows users to share geographic data. This field can provide a map interface, enabling respondents to select their location or manually input latitude and longitude coordinates. This is particularly useful when collecting precise location data.
For example, in a flood report survey, you might ask: "Please provide the exact location of the flood impact." When using the Location field, a map will appear in the survey. Respondents can either click on the map to mark their location or can manually move the cursor on the map for exact latitude and longitude values, such as 28.6139° N, and 77.2090° E. This data is valuable for creating accurate, location-based reports.
Date: This field allows respondents to select a specific date, providing them with a calendar interface where they can adjust the month, date, and year according to their requirements. This is particularly useful when you need time-related information.
For example, in a flood report survey, you might ask: "When did the flooding start in your area?" Using the Date Field, respondents can open the calendar, navigate through the months and years, and select the exact date. The default value will be the current date when the form is filled, but users can easily modify it to reflect the appropriate date of the event.
Date and Time Field: This allows respondents to select both a specific date and the exact time using a calendar and time picker interface. This field is useful when you need precise information that includes both the day and the time of an event.
For example, in a flood report survey, you might ask: "When did the floodwaters start rising in your area?" Respondents can select the date from the calendar and then adjust the time by choosing the exact hour and minute, such as August 15, 2024, 03:30.
Select: This field provides respondents with a set of predefined options to choose from. These options are created by the admin. Respondents will see a drop-down arrow, which they can click to reveal the available choices. Only one option can be selected from the list.
For example, in a flood report survey, you might ask: "What is your preferred method of receiving flood alerts?"
In the Select Field, respondents can click the drop-down and see options like:
SMS
WhatsApp Message
The respondent can then select the one option that best fits their preference.
Radio Button(s): The Radio Buttons Field is similar to the Select Field, but the key difference is that all options are visible on the form itself, rather than being hidden in a drop-down menu. Respondents can view the options directly and select only one.
For example, in a flood report survey, you might ask:
"What is your current living condition after the flood?"
In the Radio Buttons Field, the options might appear like this:
Staying at home
Temporarily relocated
In a shelter
With relatives
The respondent can select the most accurate option by clicking the corresponding radio button.
Checkbox(es): These allow respondents to choose one or more options from a predefined set. Unlike radio buttons, where only one option can be selected, checkboxes enable users to select multiple options if applicable.
For example, in a flood report survey, you might ask:
"Which resources do you currently need?"
The Checkboxes Field could have the following options:
Food
Water
Medical Supplies
Shelter
Clothing
Here, the respondent can select multiple options based on their needs, such as both Food and Water.
Related Post: The Related Post Field allows you to create a connection between different surveys by linking relevant posts. This is particularly useful for cross-referencing data from various surveys. However, it’s important to note that only posts that have been published will appear in the search results when linking; posts that are "Under review" will not be visible for selection.
For example, in a flood report survey, you might want to relate a previous disaster preparedness survey to understand how preparedness impacted the flood response. Using the Related Post Field, you can link the two surveys, enabling easy access to relevant data across surveys.
Image: The Image Field allows users to upload images to the post, with a maximum file size of 10.00 MB. To add an image, respondents can click the Add photo button and select the desired image from their device. Additionally, there's an option to include a caption for the image, allowing users to provide a brief description or context for the uploaded photo.
For example, in a flood damage report, respondents could upload images showing the extent of the flood's impact and add captions like: "Floodwaters reaching up to 3 feet in the living room."
Note: Always add an image, if you add a caption. Respondents can't submit the form by adding only a caption WITHOUT uploading the image.
This feature is particularly useful when visual documentation is needed to support the report.
Embed Video: The Embed Video Field allows users to embed videos from platforms such as YouTube or Vimeo directly into the post. Respondents simply need to paste the video link (URL) into the provided field. This feature is useful for sharing visual content that supports the post or survey data.
For example, in a flood damage report, respondents could include a YouTube video showing the flooding in their area. This allows for more dynamic and detailed reporting, providing a clearer visual context alongside written information.
You can add as many custom fields to your survey as you see fit. To add a new field, click on the Add Field button.
A pop-up box with a list of different field types will appear on your screen. Choose whichever one will work best for the type of data you are trying to capture.
Add the following details for which ever field type(s) you select:
Name: This is what is displayed as a label for your newly created field
Add field description (optional): A visual editor should appear below, you may add help text that provides additional details about this field.
Add some text in the description-editor, format it however you want to, and as long text as you want to.
Required: If set to yes, post submission will be only be successful once this field has been filled out. If set to no, post submission will be successful even if it has not been filled out.
Make responses private: This allows limiting access to responses to this field to specific users.
Default Value: You can set a default value displayed every time someone is creating a new post. example, a survey asks whether you want to subscribe to a service, and it has a default value of 'No'. If you submit without changing this value, the default value will be submitted as 'No' when you save the survey. If you change to 'Yes', the value that will be submitted will be 'Yes'. That's the value that will be submitted when the survey is saved. Note: For fields where it's possible to add a default value (all field-types except "image", and "categories"), the default value box should be displayed with no toggle-switch
Field Options: This appears in cases where you’re creating a checkbox, select or radio button field. You can add as many options as you would like.
Once you’re done, click on Save.
Note that, the description should have the same formatting as it did in the field description editor. To confirm this:
Add a new post to this survey you just created
Save the post
Go to data view
Select the post you added and select "edit"
The field description you added will be visible.
The description should have the same formatting as you did in the editor
To edit an existing field:
Select the desired custom field by clicking on it
Edit the fields (as described in the section above on Adding fields) as desired.
Click on Update when done.
You can also change the position of existing fields by dragging the field with the scroll icons to the left of every field as shown below.
To delete an existing field
Click on the trash icon adjacent to the field you'd like to delete.
A pop up box will appear on the top of the page, prompting you to confirm whether you would like to delete the field
Click on Delete to delete the field
If you’d like to cancel the field deletion process, click on Cancel
You can organize your survey into “Tasks”, allowing a deployment to add fields related to actions that need to be taken, like translation or verification. These groups of tasks are visible to specified users and can be marked as ‘complete.’ For example, if a particular survey requires verification upon submission, you can design a task to ensure your team knows the post needs to be verified before publishing. The task could include fields like whether the information was verified or not, who verified the information, how they verified it, and when they verified it. After verification, the task can be marked as complete and the post can either be moved to the next task if necessary, or published.
To add a new task:
Click on Add Task on your survey creation/edit page
A small pop up box will appear, prompting you to give your task a name
If you’d like to make this task required before post submission, switch on the Require this task be completed before a post can be visible to the public toggle. This means that, a post will not be published until this task is marked as complete
Click on Add
Once set up, you can duplicate your task as follows. Adding task fields
You should be able to add fields to tasks in the same way that you add fields to a survey.
Please refer to the Fields section of this manual for details on how to add, edit, and delete task fields.
To make additional configurations to your task, click on the Configure tab
Set the following options
_Required: _When set to yes, this task must be set as complete for successful post-submission
Task is only for internal use: This limits the visibility of this task during submission only to teams with permissions to manage posts on your deployment i.e only internal team members will be able to submit responses to this task
_Show this task to everyone when published: _This limits the visibility of task responses when viewing submitted posts if not enabled i.e. it limits the visibility of responses to tasks to internal teams only.
This is what it would look like when applied to your survey form later on:
To edit an existing task:
Scroll down to the desired task
Make changes as desired, e.g changing the task name, description, and/or making a task required or not
When done, click on Save at the bottom of the page
To delete an existing task
Scroll down to the desired task
Select Delete Task button
Once the survey form has been created and all the required fields have been filled, you can translate the survey into other languages if you want to. Below are a video and written setup guides to help you.
Note: You can add more than one language
Click on Add translation at the upper right-hand corner of the survey form.
A pop-up module will appear on your screen, select the language(s) you want to translate to using the checkboxes beside the language names.
Then:
Click on Add to finish.
You will be redirected to a survey form with the translatable content in the default language and fields where you can add your translations
On the empty fields, translate the survey details into the chosen language e.g in the above image the default language is English and the added language is French.
On the survey, you will then be able to see the available languages that the survey has been translated into.
Similarly you can see this translate dropdown to select a language to translate to on the post edit form in the data view:
To translate the added fields on your survey;
Scroll down to fields.
Select the desired custom field by clicking on the edit button icon that is on it.
A pop-up module will appear. Translate the field details to the chosen language.
Translate the remaining fields that you added.
To translate tasks:
Scroll down to tasks.
Translate the task details. You should be able to translate the task fields in the same way that you translated the fields in the surveys. Please refer to the Fields section of this manual for details on how to translate task fields.
Click Save when all is done.
You can add additional configurations to your survey e.g setting a survey color etc. To do so, click on Configure on the top of the survey editor.
Configure the settings to suit your needs
Require posts be reviewed before they’re published: When toggled on, posts submitted on your deployment will not be made public i.e accessible to anyone beyond your internal team, until it is reviewed ( It will remain in draft). Setting this option off will automatically publish all posts submitted on your deployment.
Hide author information: When toggled on, this option hides author information e.g phone numbers, twitter handles and email addresses of people who submit posts to your deployment from the public. Note: logged in users with permission to manage posts will still be able to see author information.
Hide exact location information: When toggled on, this option hides the exact location of posts on the map. Only the people with the permission to edit will be able to see exact locations, those without permission will only able to see rounded locations. The locations will be accurate to 0.1 km.
Hide exact time information: When toggled on, only people with permission to edit responses will be able to see exact time submitted. Other people will see only the date.
_Who can add to this survey:_You can limit submission of posts to your survey by roles. By default, surveys are open to the general public for submissions, and not limited to internal roles.
Color: Select a color or input a specific hex value to choose which color will be associated with this survey. Pins on the map will match whichever color you select.
Select default language for this survey: Click on the dropdown menu to choose the default language. This will be changing the language of the deployment that is currently in.
Click on save once your configuration options are complete
Ushahidi provides the ability to Share your survey across multiple platforms. Share via:
Web address: Copy and paste this link to direct people to your survey form
Facebook: Share the survey form on Facebook
Twitter: Share the survey form on Twitter
Embed: Copy and paste this HTML block of code to embed the survey form on any site across the web
To edit a survey:
Click on a survey from the list of surveys on your page.
From here, change your survey details as desired then click on Save.
On the surveys settings page where you have a list of surveys:
Click on the bulk actions button
Check/select the survey(s) you would like to delete
Then click on the delete button or icon.
A pop up box will appear on the top of the page, prompting you to confirm whether you would like to delete the survey and all its data.
Click on Yes, delete to delete the survey
If you’d like to cancel the survey deletion process, click on No, go back. Note: Once you delete your survey all its data and posts will be deleted . This cannot be undone, so take caution when you perform this action.
Categories are a way of grouping your posts based on their content within a Survey. The setup in this guide is demonstrated in the below video as well. You can watch and follow the guide at the same time!
Video coming soon
To access the Categories configuration page, on the sidebar, click on Settings
Then, click on Categories. You’ll be redirected to a page where you can manage categories on your deployment.
Unlike previous Ushahidi platform, your deployment DOES NOT come with pre installed/set-up categories. You will need to create this on your new Ushahidi deployment. Categories are now treated as custom fields within a Survey. This gives you the flexibility to add certain categories to some surveys, but not others.
There are two ways to create new categories.
First way to create categories: Navigate to Settings → Categories. Click on the Add Category button as shown below.
Add the following details to the form
Category Name: Give your category a name that will appear on your homepage and when users are creating new posts.
Description: You can provide a brief description of what kind of information you will fall under this category
Child / parent settings: You can choose to set any category as a “child” to another, creating a hierarchy within the categories themselves, and will reflect this in their positioning on the sidebar.
Default language: Click on the drop down menu to select your preferred default language
Roles: You can opt to set your category as visible to specific user roles on your deployment here. This list is populated based on custom roles created. More on Roles here.
In the upper right corner of the category page, you will see the default language that your deployment is currently in.
You can translate the category into other languages. To do that:
Click on Add translation at the upper right-hand corner of category form.
A pop-up module will appear on your screen, check/select the language(s) you want to translate to.
Click on Add to finish.
You will be redirected to a page with the translatable content in the default language and fields where you can add your translations.
Next:
On the empty fields, translate the category name and description details into the chosen language e.g in the above image the default language is English and the added language is Spanish.
Click Save when all is done to create the category. You can now choose to add this category to any of your Surveys.
In the dropdown (inside the form), you will see the available languages the category has been translated into.
Second way to create categories: Add categories as custom fields as you build and edit Surveys. First, navigate to Settings → Surveys, and either select the already existing Survey you’d like to edit, or create a new Survey.
Click on Add field button in the survey builder/form and select Categories from the list of field options.
Configure the following
Name: Name or prompt for your category survey field
Field description: Optional description for the category
Which labels should be available: Select which categories you’d like to add to the field as options
Click save to save your new categories field. It will now appear as a custom field with the appropriate categories on your Survey form.
To edit a category, click on the desired category from the category list page.
You’ll get redirected to the Edit Category page, where you should be able to add/edit details as described in the adding categories section above.
When done, click on Save, and your changes will reflect shortly.
You can delete one or multiple categories at a time.
To delete a single category:
Click on the category as if you want to edit the category
Find the delete button at the bottom of the form
A pop up box will appear on the top of the page, prompting you to confirm whether you would like to delete the category/categories.
Click on Yes, delete to delete your category/categories
If you’d like to cancel the category deletion process, click on No, go back
To delete multiple categories:
Click on bulk actions from the Categories list page in settings
Then click on the Delete button or icon
A pop up box will appear on the top of the page, prompting you to confirm whether you would like to delete the category/categories.
Click on Yes, delete to delete your category/categories
If you’d like to cancel the category deletion process, click on No, go back
Vonage is a cloud-based SMS API that lets you send and receive a high volume of messages to mobile phones in any country at wholesale rates.
NB: You need a nexmo account to be able to configure this as a data source. To sign up, go to ()
To get started with Nexmo set up,
Log into your Vonage Dashboard
If you haven’t already, you’ll need to buy a number that you will use to receive SMS messages from.
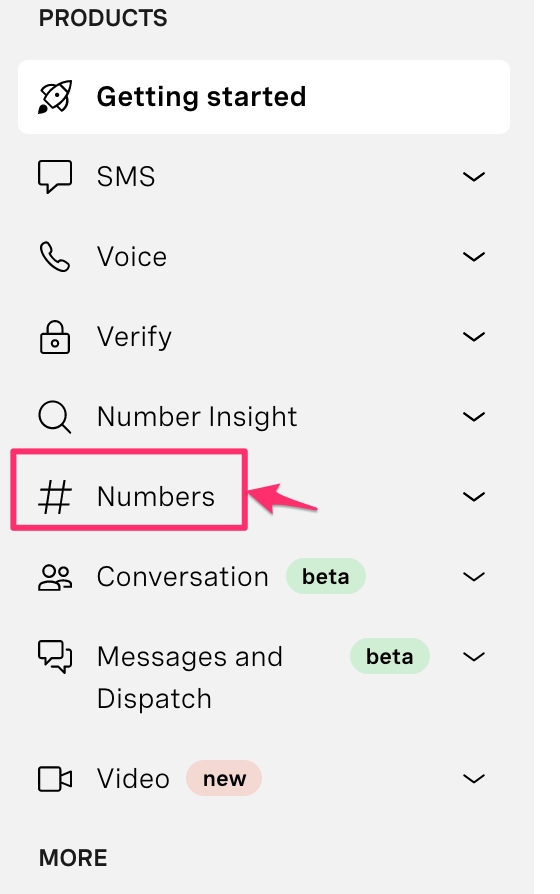
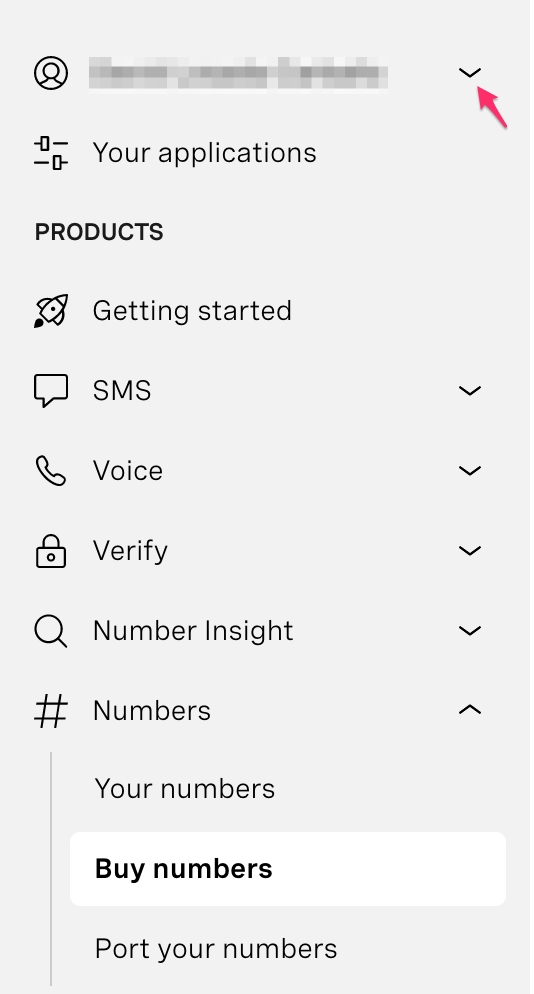
Click on Numbers on the top menu bar on your Vonage dashboard
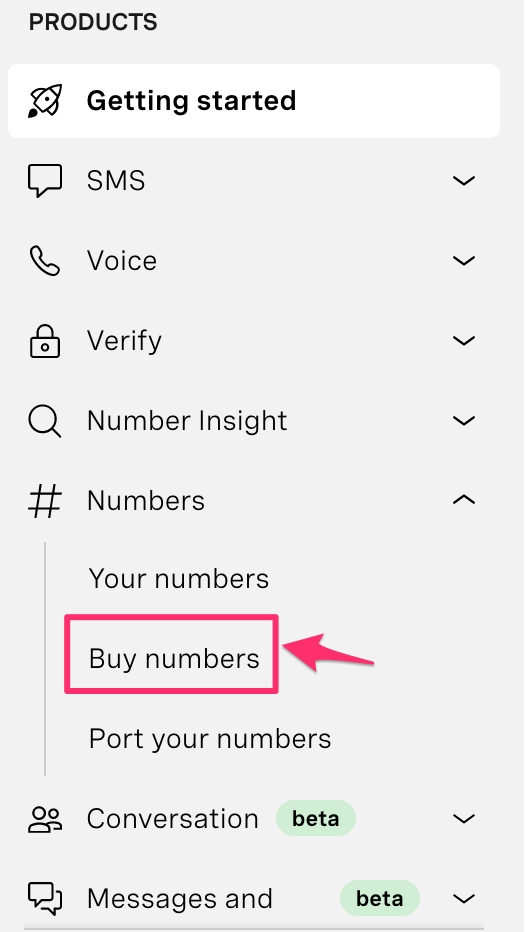
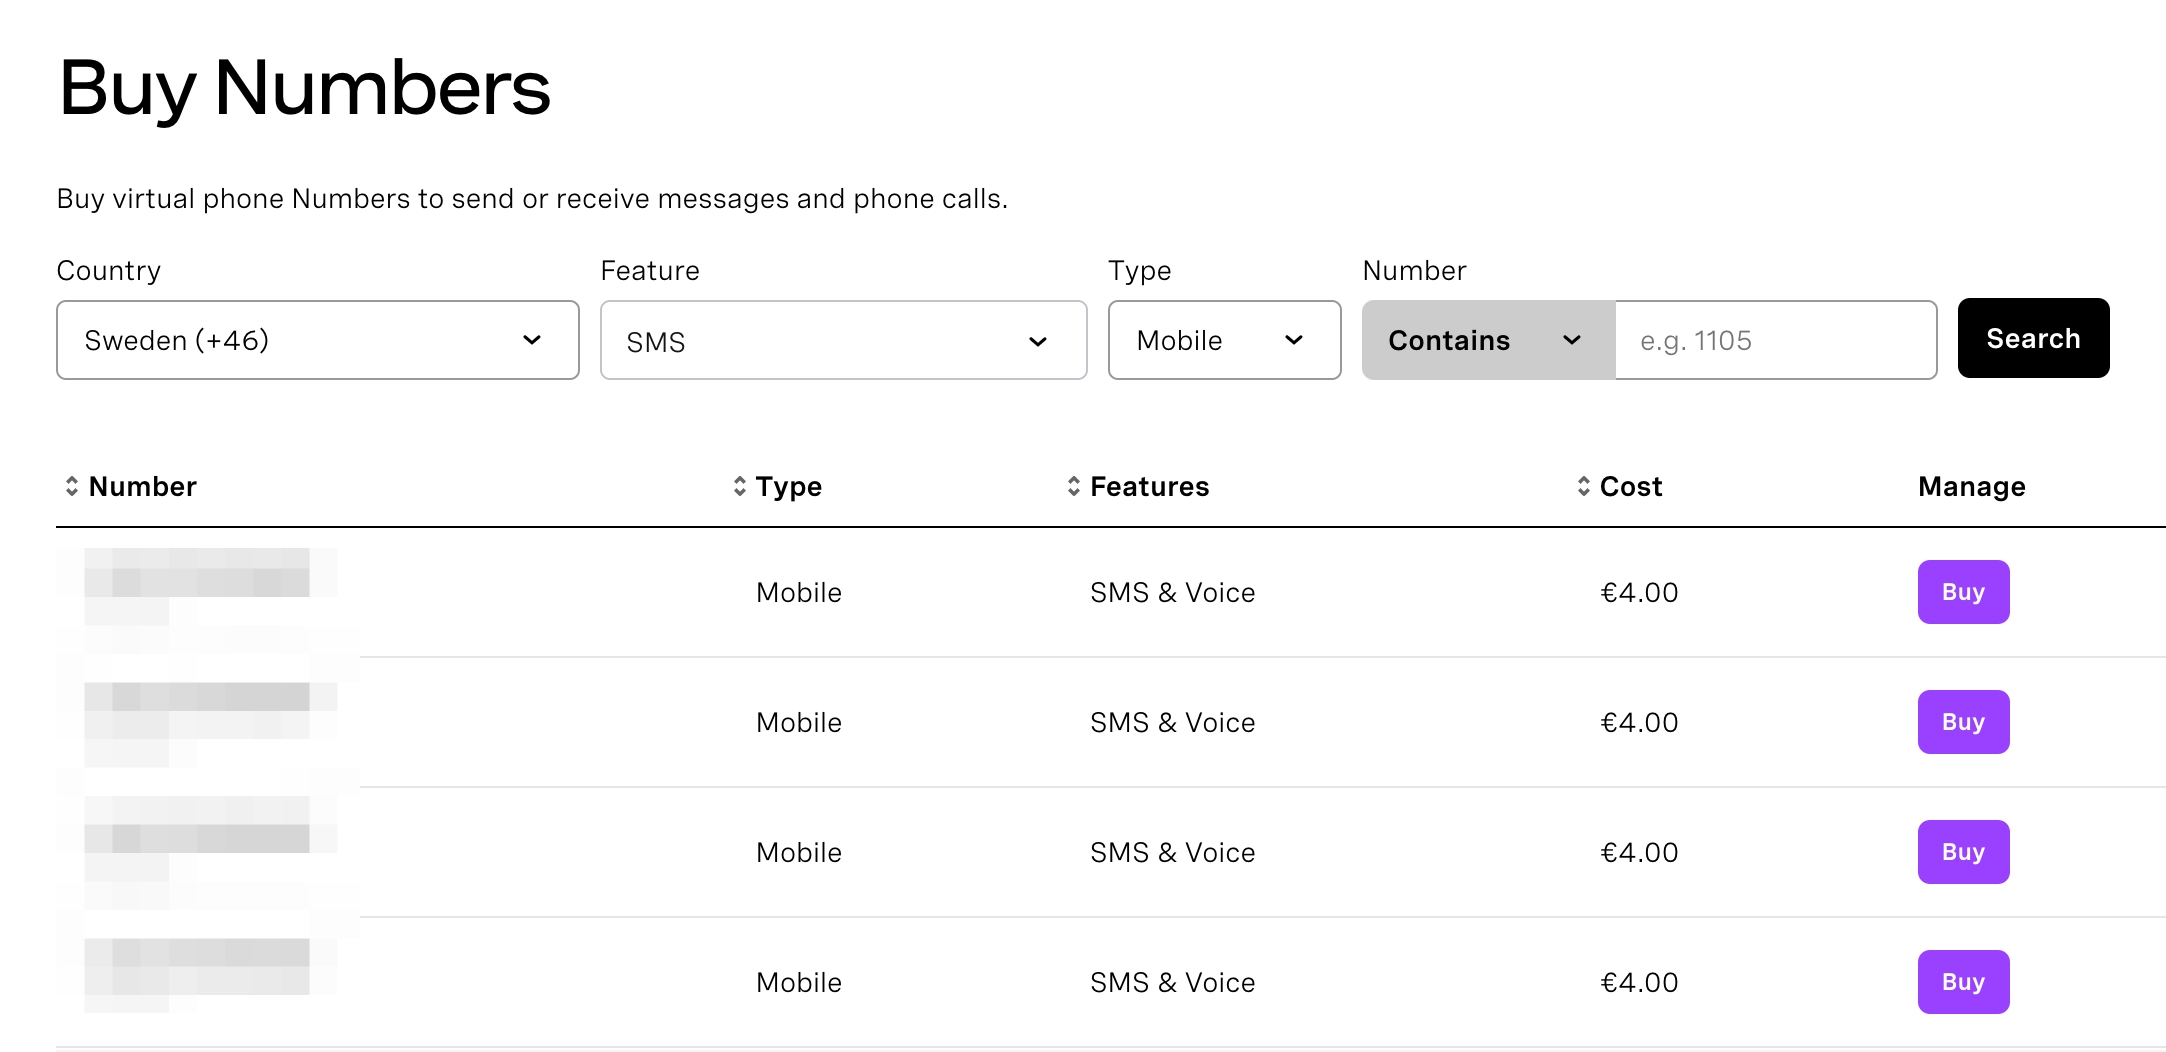
Click on Buy Numbers
Set the desired criteria of the phone number you’re looking to use
Select the country in which the SMS Number will likely be operating in
Select the features of this phone number(SMS only, Voice only or SMS & Voice)
Select the type of phone number it will be (Mobile, Landline, Toll free)
Click on search. A list of available numbers based on the criteria set above will appear.
Click Buy on the number you’d like to use.
Once you have a phone number, note it down as you’ll need it to configure your data source later on.
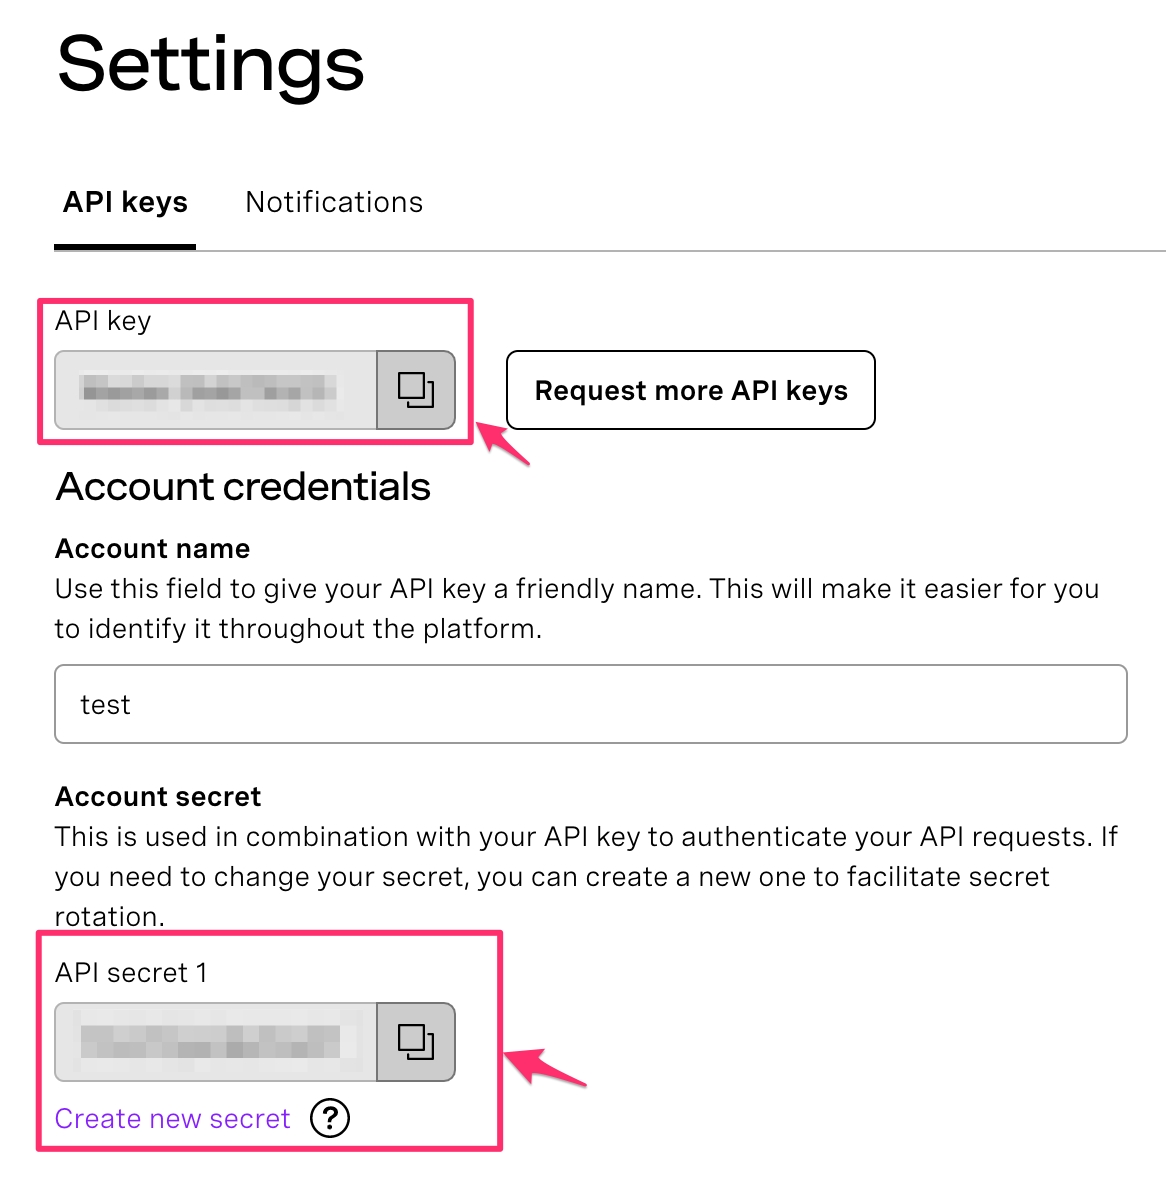
You’ll need to grab your API credentials from your nexmo settings page.
Pick your API KEY and API SECRET from the API Settings section.
Go back to your Data source settings page on your deployment
Click on the drop down icon on the right to get to your Nexmo configuration page
Enter the following details, which you got earlier from your Nexmo Dashboard
From: Enter the phone number you will use to receive SMS messages from your nexmo account
API KEY: Enter the API key retrieved from your nexmo settings page.
API SECRET: Enter the API secret retrieved from your nexmo settings page.
Click on Save **and this data source’s settings will be saved. Unstructured posts from SMS will now be pulled into the platform from Nexmo.
To enable/disable the Nexmo data source, simply click on the green toggle.
If you’d like to edit your Nexmo configuration, simply click on the drop down icon on the right while on the data sources list page and make your changes.
This section allows you to configure Africa's Talking as a data source and receive SMS messages as unstructured posts in your Ushahidi deployment.
Login to Ushahidi.
Click on Settings -> Data Sources
Click Add source
Select Africa's Talking
Enter your Username, API Key, and SMS Short Code, and then click Save.
Login to Africa's Talking Dashboard and click on app
Click on SMS -> Callback URLs -> Incoming Messages
Enter the Ushahidi's callback URL and click Submit.
The URL is your deployment backend's API URL, ending with "/sms/africas-talking"
The API URL is often slightly different from your deployment's website URL.
If you are using the ushahidi.io hosting service, you will always need to insert ".api" after your subdomain. Example:
Assuming your deployment's URL address is My-Deployment.ushahidi.io
The API URL for your deployment would be: My-Deployment.api.ushahidi.io
Consult with your system administrator if you are configuring a deployment hosted outside of ushahidi.io
Don't forget to append "/sms/africas-talking" to the resulting API URL
e.g. https://quakemap.api.ushahidi.io/sms/africas-talking
Twilio allows you to programmatically make and receive phone calls and send and receive text messages using its web service APIs.
NB: You need a Twilio account to be able to configure this as a data source. To sign up, go to **[_)
To get started with Twilio set up,
Log into your twilio account.
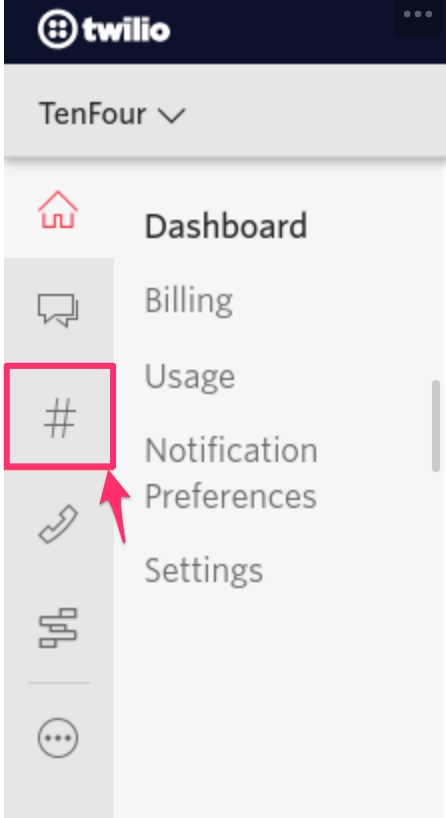
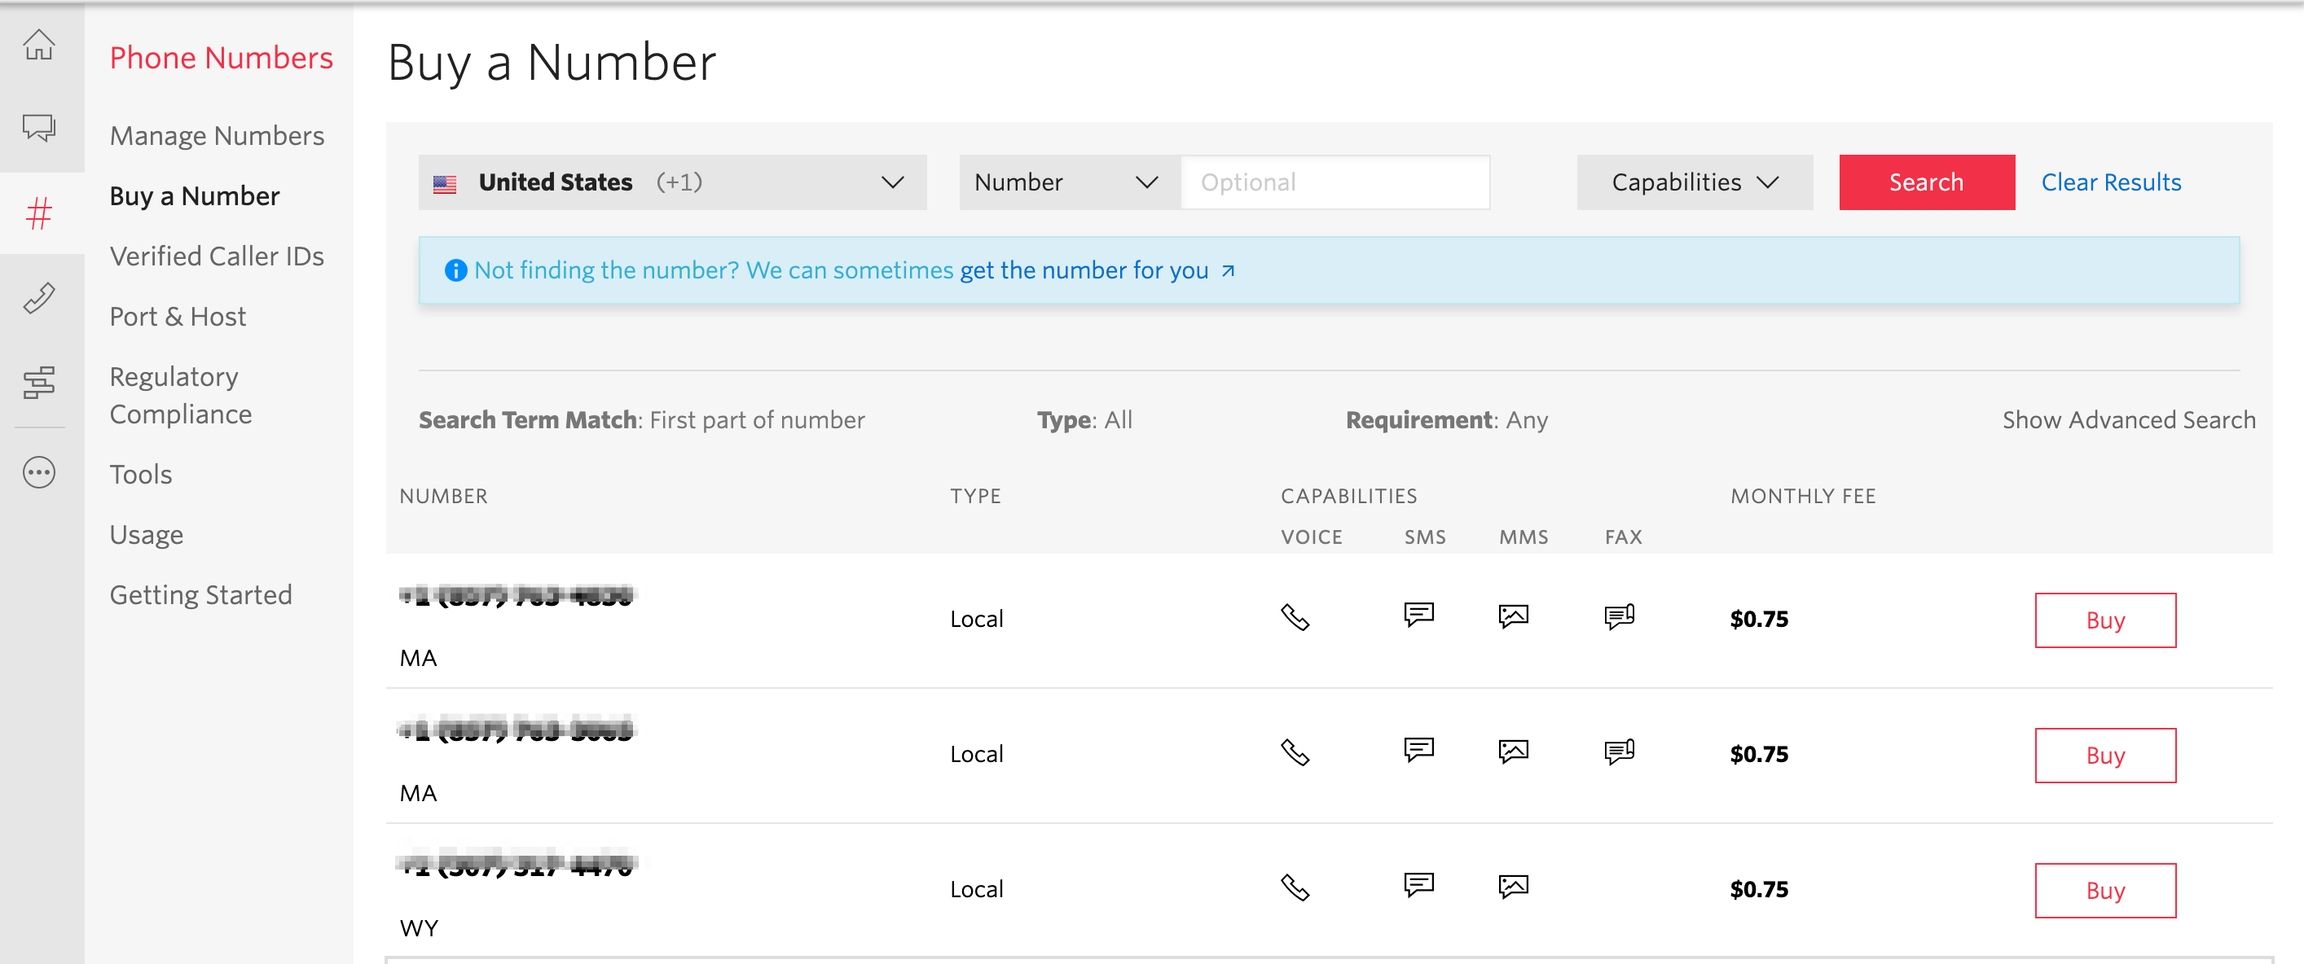
You’ll need to buy a number to use. Click on the hashtag icon
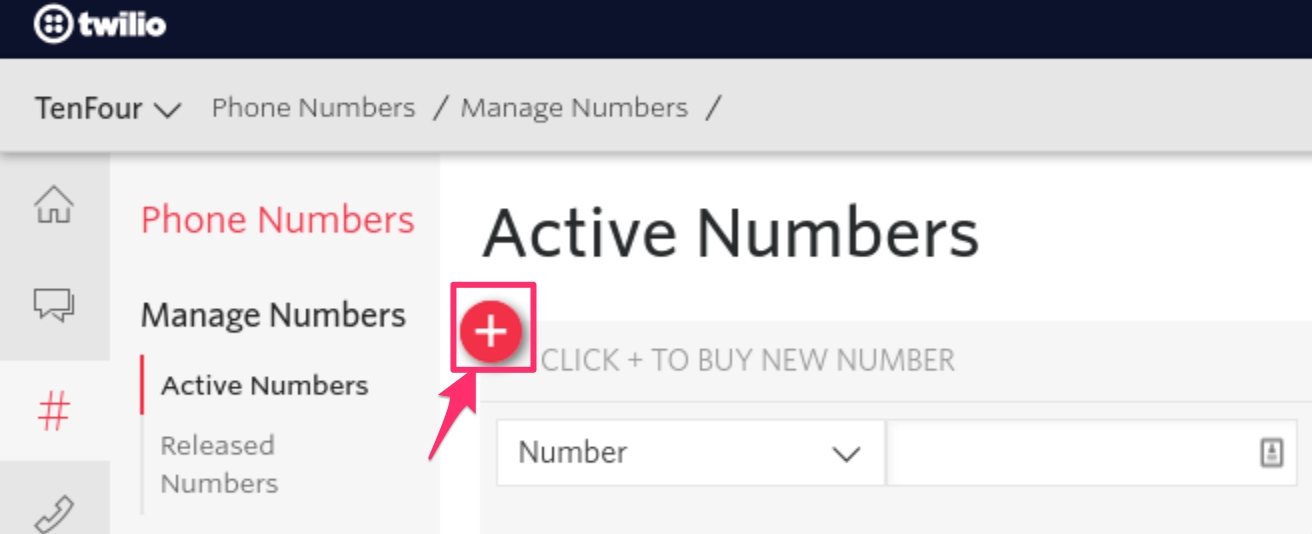
Click on the red "Plus" icon.
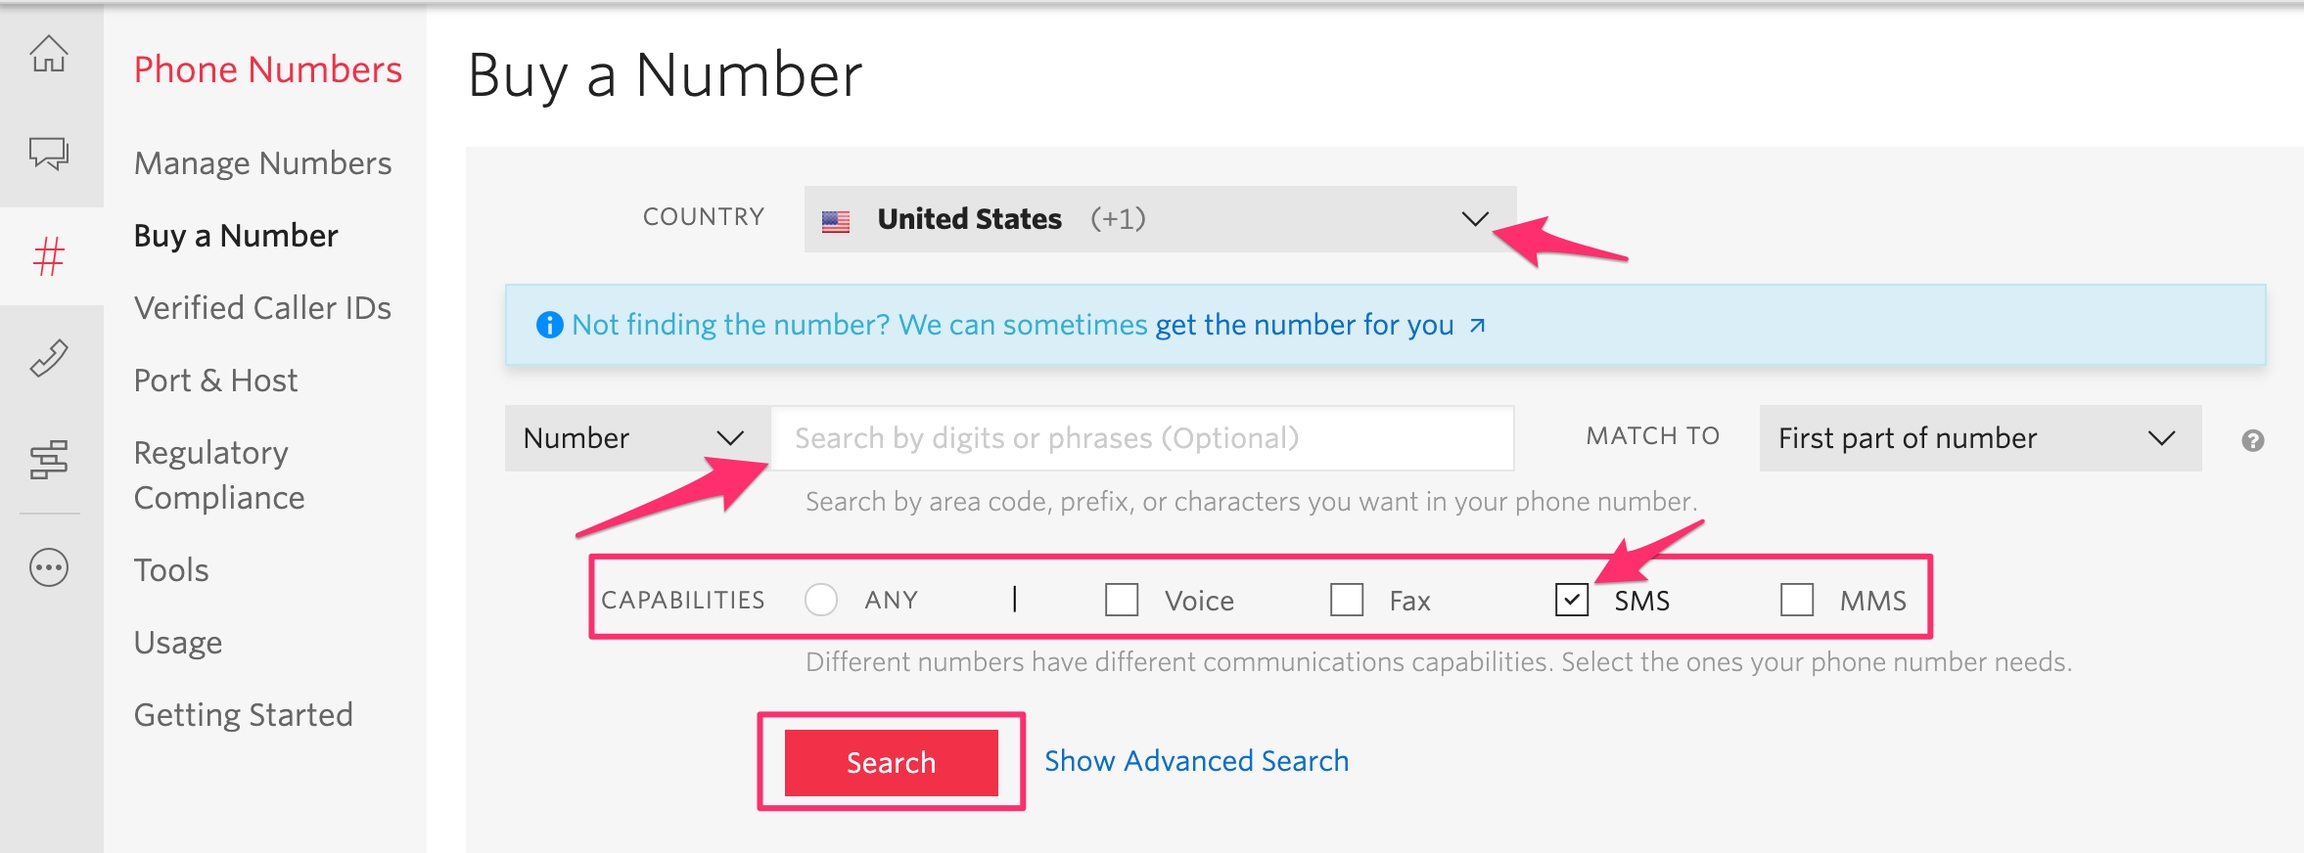
Select the desired criteria for your phone number In the number selection/purchase screen
Select the country where you need a phone number. This is the number that people will use when sending a report through SMS.
Location/Number: You can search numbers by digits/phrases or by location. This is optional.
Capabilities (Voice, SMS, Fax, MMS): Make sure you tick the "SMS" checkbox. We want to make sure Twilio only shows us numbers with SMS capabilities. If it can't be ticked/clicked, then it means that Twilio doesn't have any numbers with SMS capabilities in that country.
Click on **_Search**_. A list of available numbers with their rates based on the criteria set above will appear
Click Buy on the number you’d like to use.
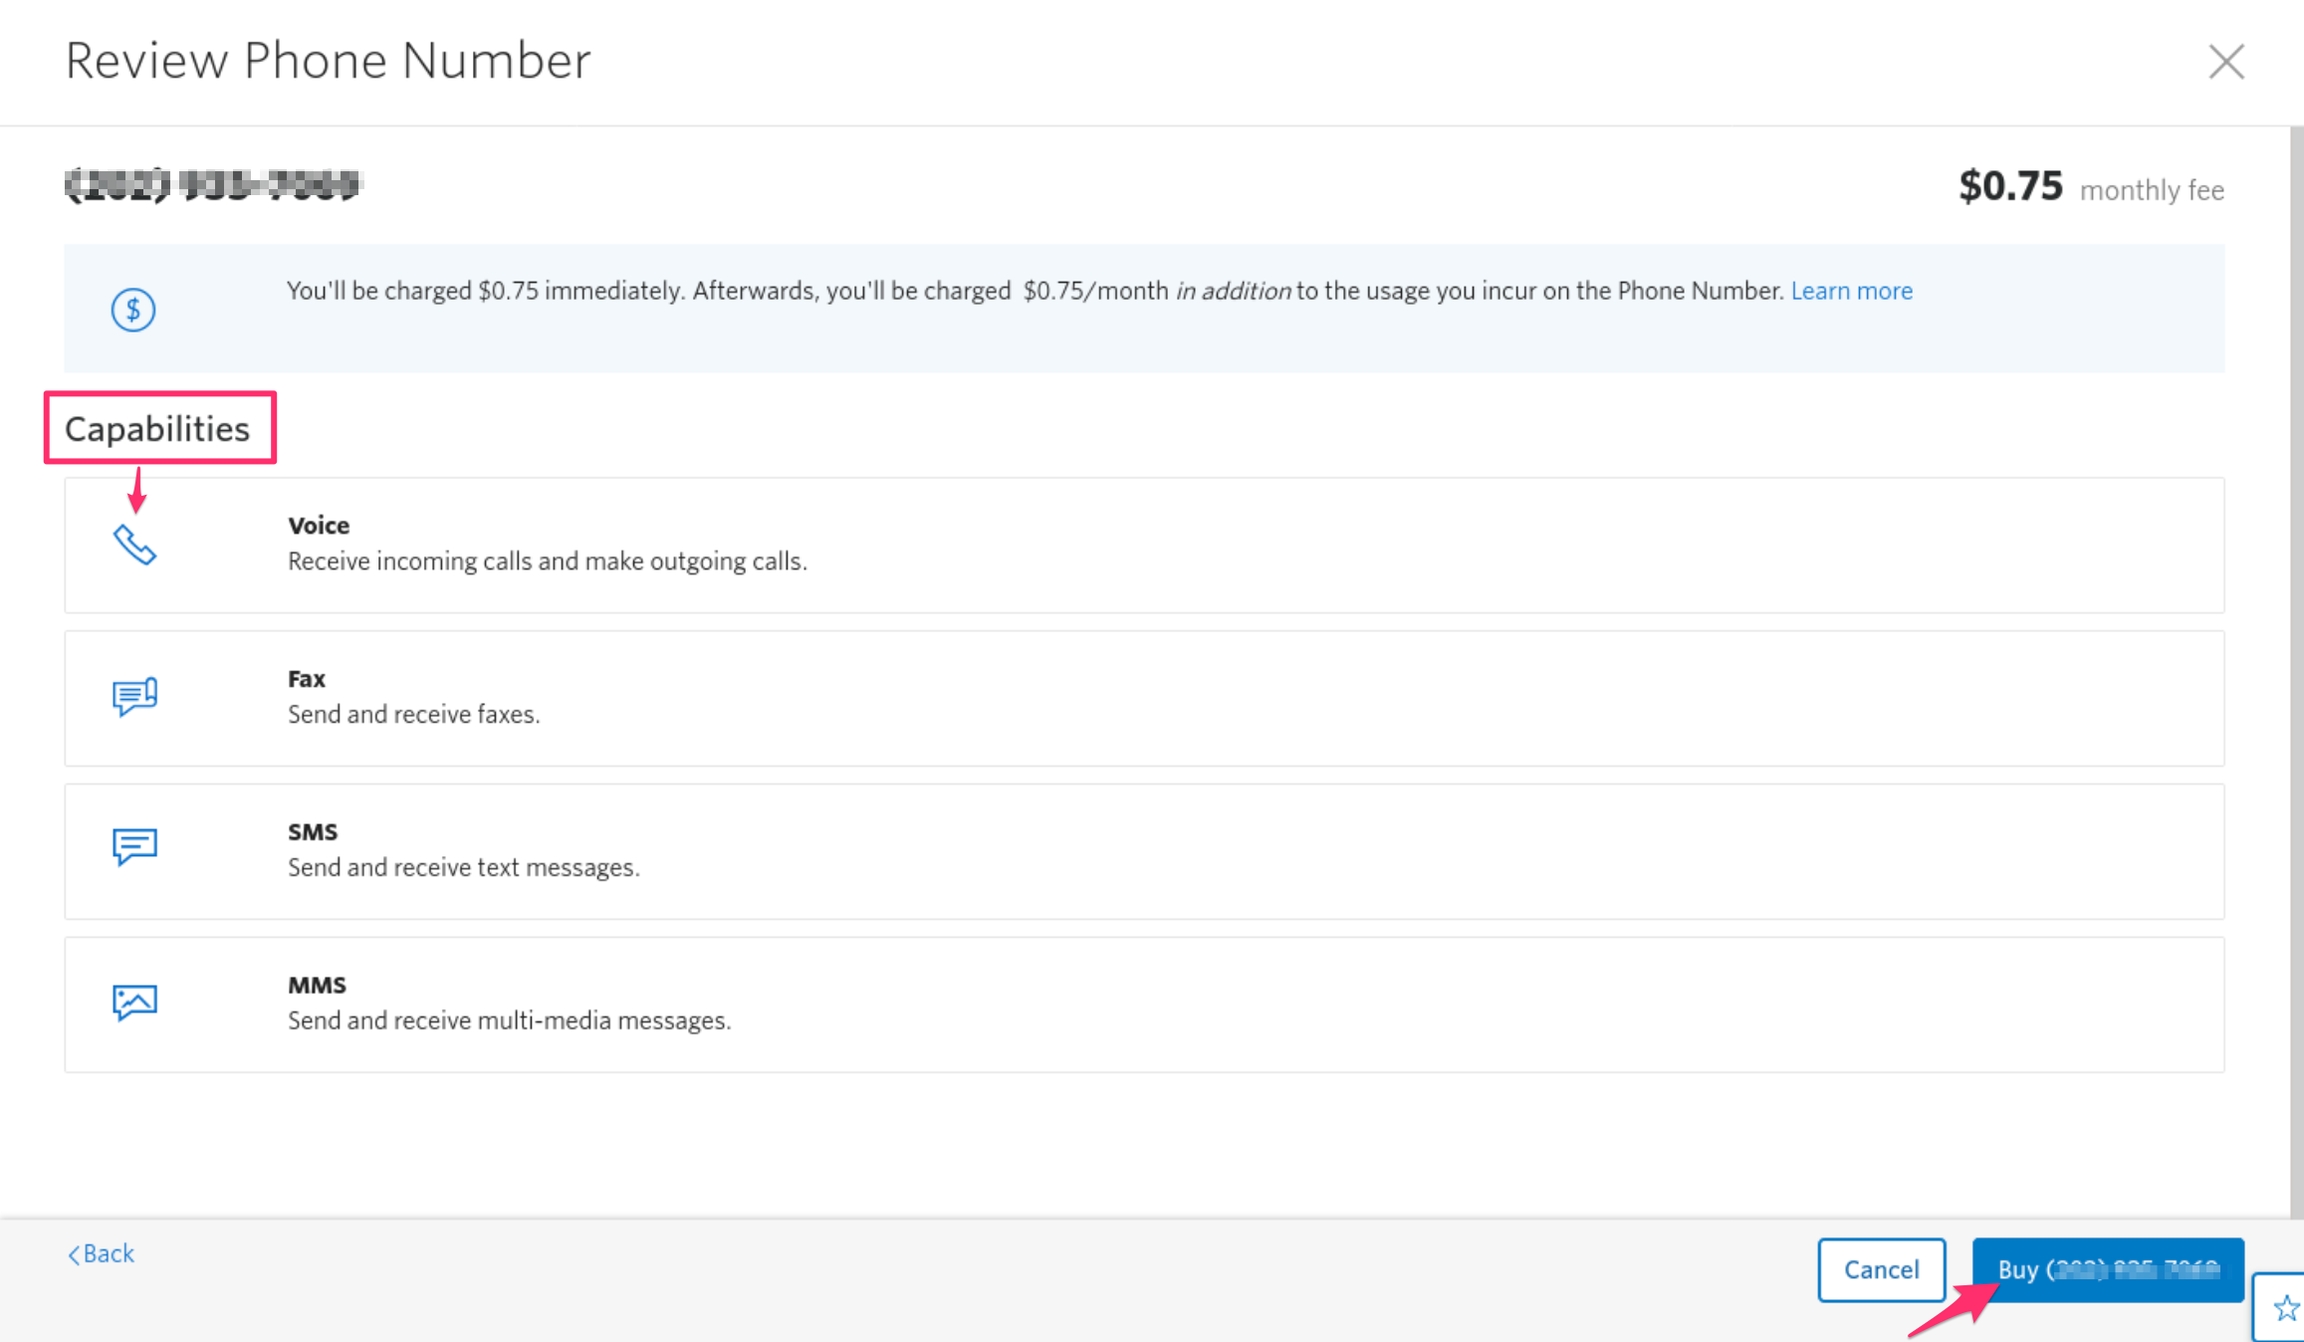
You will be shown a screen like this one below where they confirm all capabilities, the number, and other details.
Click the buy button at the bottom right hand of the screen to purchase your number.
Once you have a phone number, note it down as you’ll need it to configure your data source later on.
First, we need to get the following information from your Twilio account:
Phone Number: the number you just purchased. If you forgot it, you click the "Hashtag" icon in Twilio again to see your available numbers.
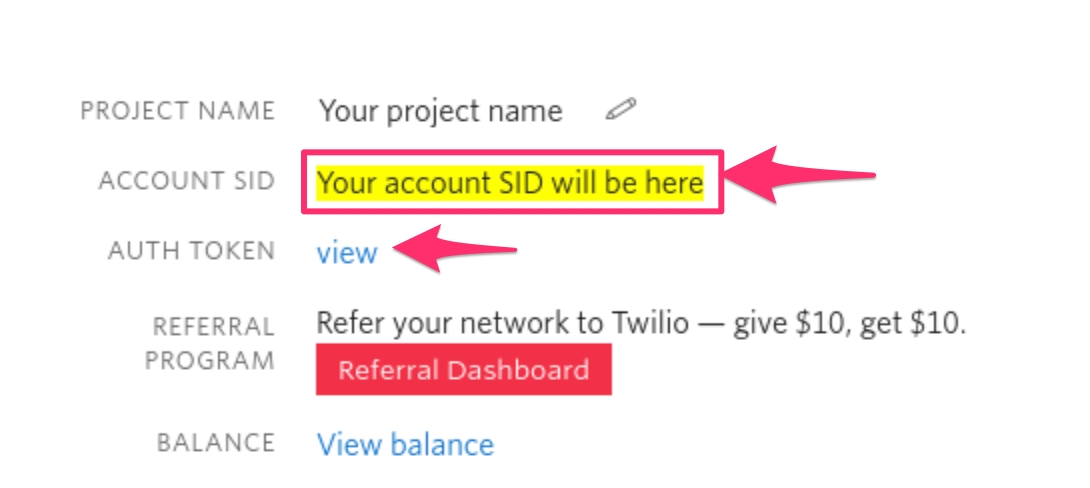
Account SID
You will see a panel like the one below with details about your project. Get the Account SID from it (we've highlighted it in the screenshot as a reference)
Auth Token
In the same panel as the account SID, you will see a "view" link next to "Auth token" as shown on the diagram above.
Click it, and it will display your account's auth token.
Next, with the Account SID, Auth Token and Phone number you just obtained:
Go to your Datasources settings page on your Ushahidi deployment.
Click on the drop down icon on the right as shown
You will see a list of fields like this one
Enter the following details, which you got earlier from your Twilio Account
From: Enter the phone number you got from Twilio.
ACCOUNT SID: Enter the account SID of your Twilio account
AUTH TOKEN: Enter the Auth Token retrieved from your Twilio account Dashboard page
SMS Auto Response: This will be sent automatically when a user sends a message to your Twilio number. You could use it to provide reference information, like thanking the user or just confirm receipt.
Click on Save **and this data source’s settings will be saved. Unstructured posts from SMS will now be pulled into the platform from Twilio.
To enable/disable the Twilio data source and choose which survey to import to, simply click on the green toggles.
At this point, your Twilio setup in Ushahidi Platform is ready to use but we need to do some follow up tasks in Twilio to connect both of them.
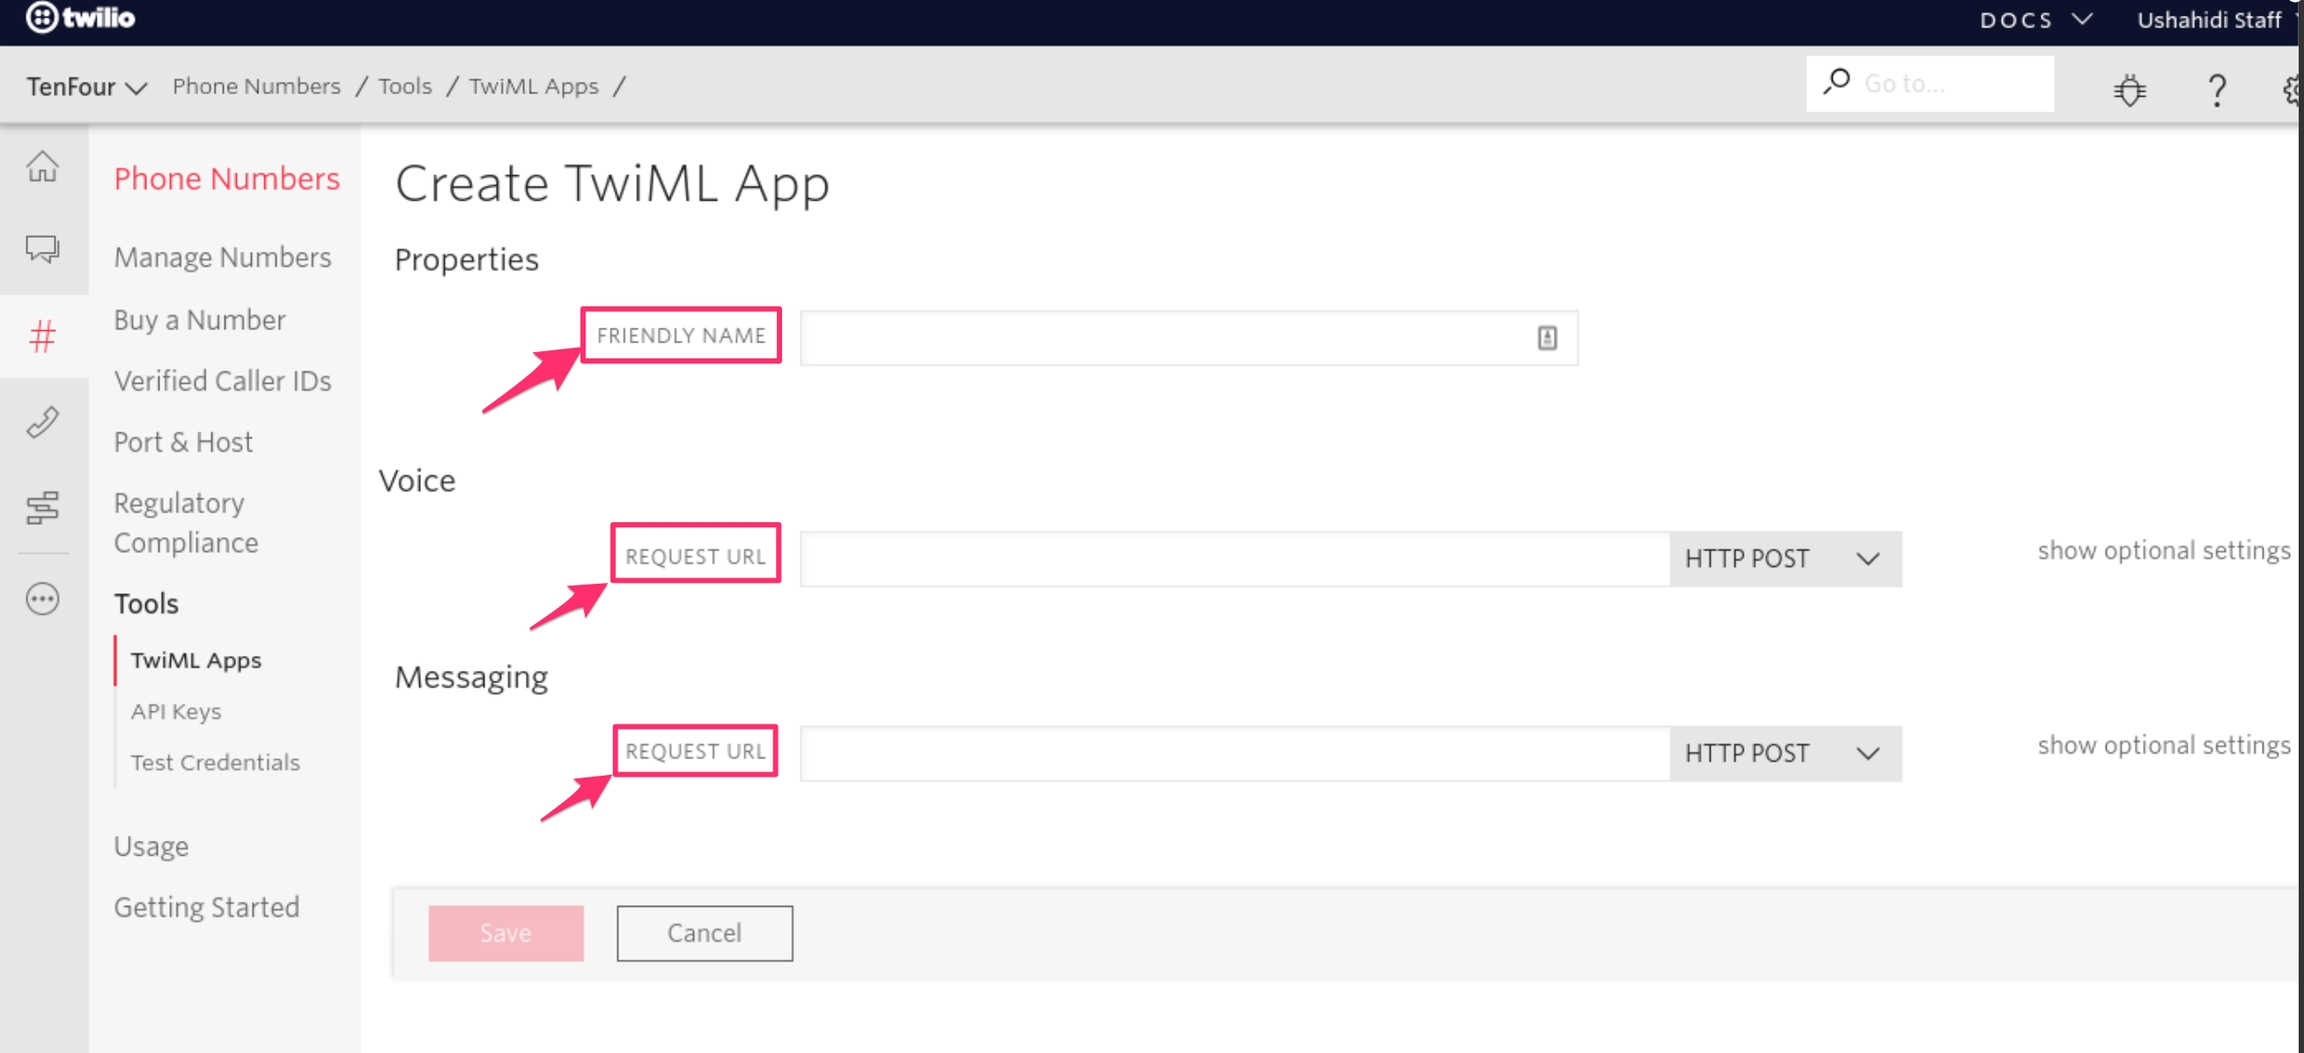
Click on the red "+" button to create a new app. You will see a screen like the one below.
Fill in these details;
Friendly name: Write down a name that helps you remember what this app does. We usually choose the deployment name as the "friendly name" in Twilio.
Messaging: In this **section you will need to add your deployment's Twilio endpoint URL. This is the API Url to your deployment + the endpoint to connect to.
Follow this formula to get your Request URL:
After you are done with adding Messaging and friendly name, you can click the red "Save" button.
Click on your number.
Scroll down and you will see a form like this one.
In the configure with field: Select TwiML App
in the TWIML APP field: Enter the Friendly name you created above for your deployment. This will ensure that when you get an SMS, Twilio sends a request to Ushahidi platform to save the message.
Send an SMS to the phone number you purchased and configured (ie from your own phone).
You will see the messages your Twilio number has received and sent in the list
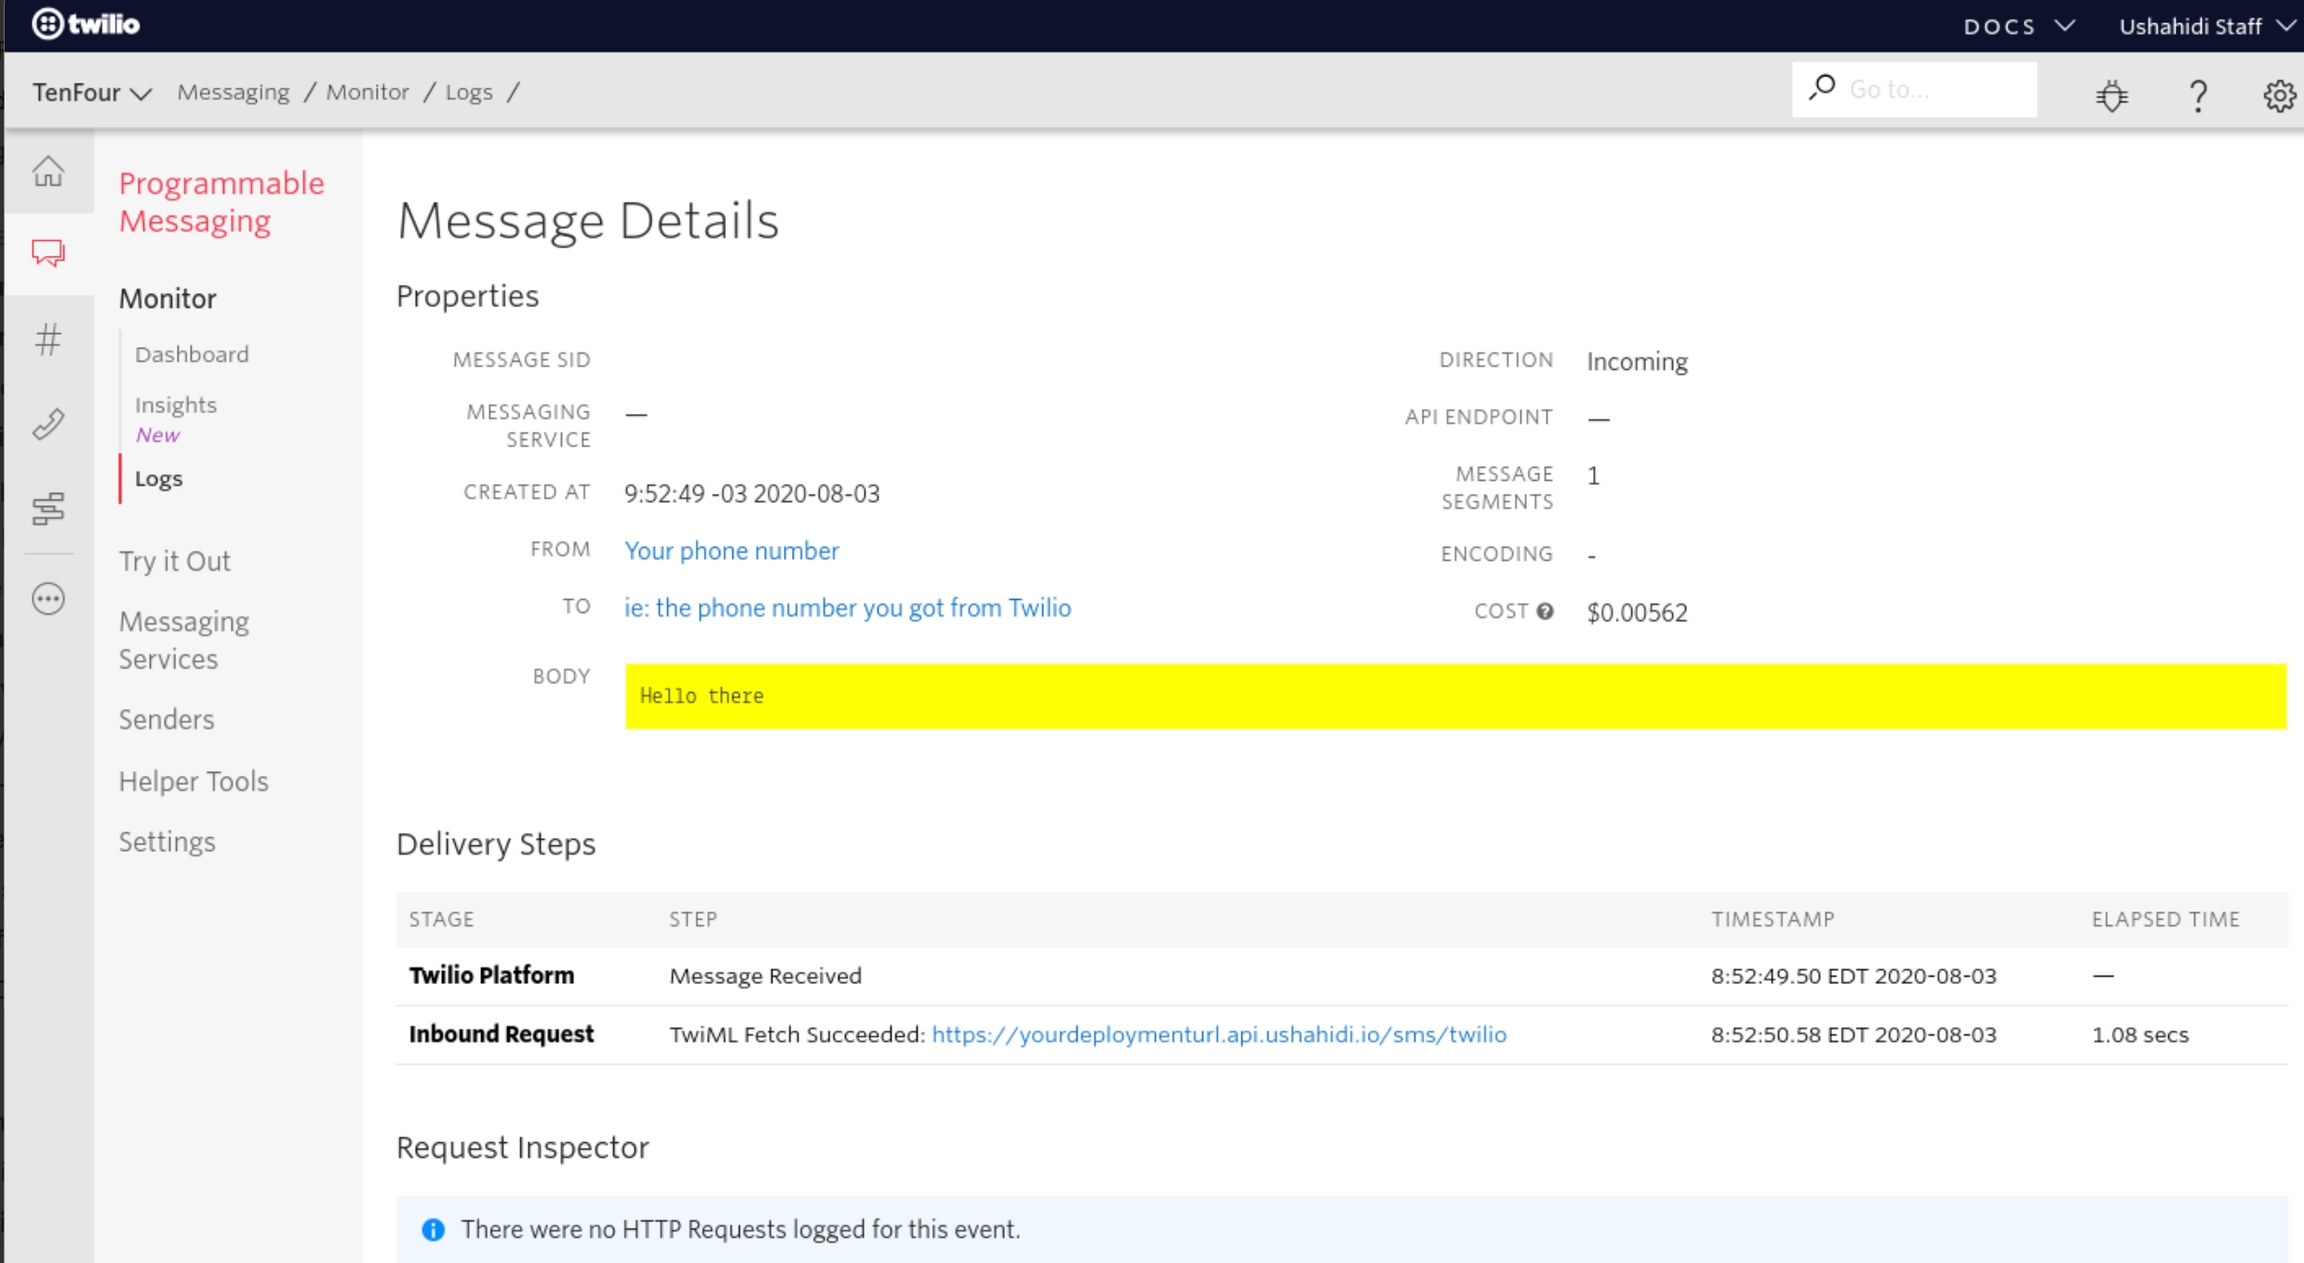
The list will look like this. You can click on the red link under "Date" to see the details of each message.
Example of a single message below.
Go to the Ushahidi Platform
Go to the data view
You should see the messages you sent in the data view list
Go to where you can set up the webhook. This is where we can make Nexmo aware of the existence of your Ushahidi deployment and help them connect with each other. Enter the sync URL i.e “ on the inbound SMS webhook field as shown below and save changes.
Go to
Go to where you can create Twiml apps. This is where we can make Twilio aware of the existence of your Ushahidi deployment and help them connect with each other.
For deployments, the rule is always the same. Given a deployment with the following url "https://**yourdeploymentname**.[ushahidi.io](http://ushahidi.io)" + the API Url will be = "https://**yourdeploymentname.api**.[ushahidi.io](http://ushahidi.io)".
Your deployment URL: ""
The API URL: ""
The Request URL then would be is what you will enter in the "Request URL" field.
Go to your list of active phone numbers and click on the number you purchased
You can validate that messages are getting to Twilio by going to the Programmable SMS logs


